
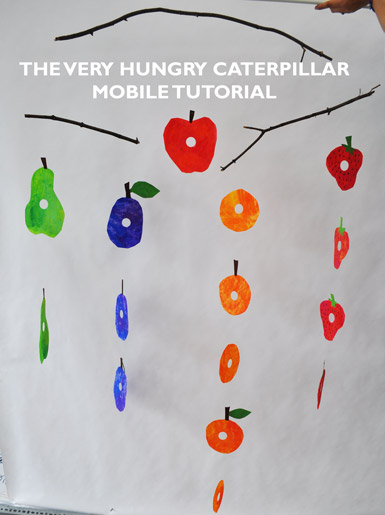
Here in The Studio we often use tissue paper for a variety of creative projects because it is accessible for so many ages, and it connects so well with Eric Carle’s artwork. When looking at all the collage illustrations by Eric Carle we are always so amazed at how versatile the simple materials that he uses really are. The textures and delicate shapes that he can achieve with such a fragile paper are quite surprising and there is something so magical and eye-catching about the crisp bold shapes and colors in his works of art. This project will help you create a light-weight mobile to hang in your classroom or home. Follow the steps below!
Materials:
Tissue paper (white or in the colors of the fruit)
8.5"x11" clear transparency sheets (sold at office supply stores for photocopiers)
Mod Podge
Paint brushes
Tempera paint
Scissors
Circle cutter (optional)
Bookmaker's awl tool (or something to punch a small hole)
Fishing line
Sticks

We were interested in ways to keep the tissue paper’s translucence and lightness, but because this type of paper is so delicate we thought about trying to strengthen the paper by gluing it to the clear transparency sheets. Mod Podge is a useful glue because it will work with a range a materials and it can be found in most craft stores. We started by putting a layer of Mod Podge on the transparency and laying a sheet of tissue paper on top.
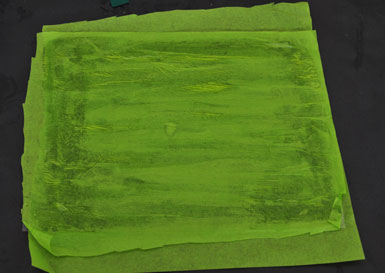
We experimented with using both white and colored tissue paper and both look beautiful painted. Make sure the tissue is securely attached by adding more Mod Podge on top and let the glue dry. We then added a second layer of tissue paper on the back of the transparency sheet so that the mobile would look the same on both sides as it turned and moved.

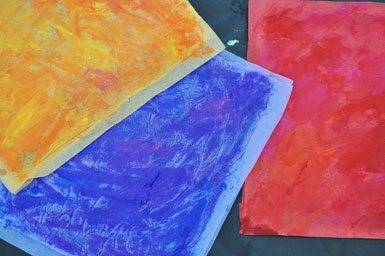
After the glue is dry the tissue paper is ready to be painted. We had fun mixing the colors right on top of the tissue paper.
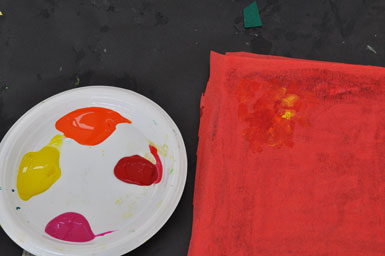
Children can help with painting the papers in fun colors. Once the sheets are dry they are ready to be cut out into the fruit shapes. We made two red sheets, one green sheet, two purple sheets and two orange sheets for the five different types of fruit in the book.
Feel free to make your mobile pieces any color, size, or shape to make it unique!
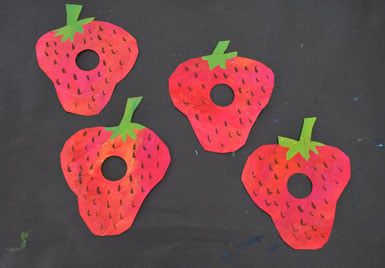
After cutting out the basic shapes of the fruit we added extra little details like stems, seeds, and leaves to make it look more like Eric Carle's illustrations in The Very Hungry Caterpillar.
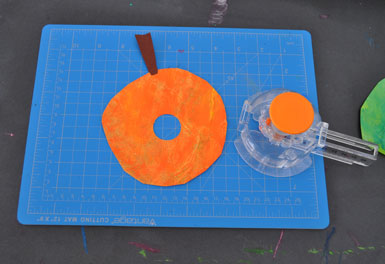
To make the holes in the middle of the fruit we used our circle cutter by Fiskars. You can see our post about other good circle cutting tools here. An XACTO knife would also work fine. Remember to use a self-healing mat under your paper so you don’t cut into your table.
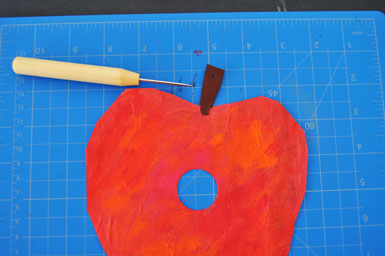
You can then use an awl or other sharp pointy tool to make holes in the top and bottom of the fruit shapes to connect them on the mobile, again with a self-healing mat under your working area.
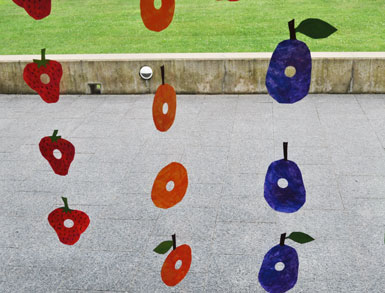
Once the holes are in the fruit then the shapes can be connected with the fishing line. You can configure your mobile however you would like and it can be a challenge to get everything to balance. If you want ideas for mobiles, here is a good diagram of some different options for designing your mobile. You can find the middle balancing point on the stick by balancing the stick on one finger. Once you find the balancing point with your finger, you know where to attach the fishing line.
Have fun creating!
