You and your kids will have a major crush on this gorgeous STEAM (science, technology, engineering, art, and math) project that explores the science of candy making. With a few handfuls of colorful candies and some cookie cutters, young learners can create beautiful, edible art made from disorganized sugar crystals.
You’ll Need
- Clear, colorful hard candy (Life Savers or Jolly Ranchers work well)
- Cookie cutters
- Hammer or meat pounder
- Plastic zipper bags
- Oven
- Baking sheet
- Cooking spray
- Eye protection (safety glasses or sunglasses)
Safety Tips and Hints
Adult supervision is required for this project. Melted candy is very hot and sticky and can cause burns.
Wear glasses when hammering candy.
Cookie cutters that sit flat on a baking sheet and don’t have too many details work best for this project.
What to Do
Step 1: Pre-heat the oven to 350° F.
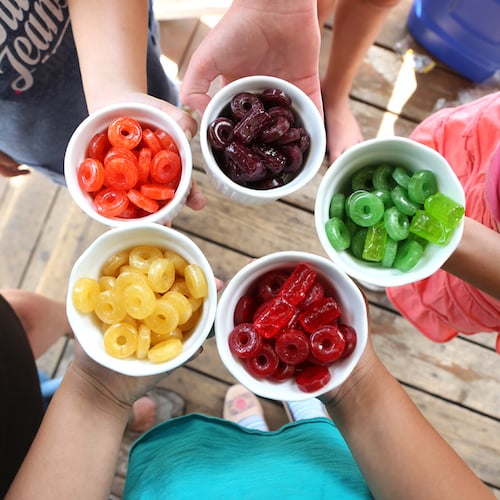
Step 2: Ask your child to unwrap the hard candy and sort it into bowls or piles by color. Ask your young scientist to describe how it looks. Is it clear? Is it cloudy? Does it look like glass?
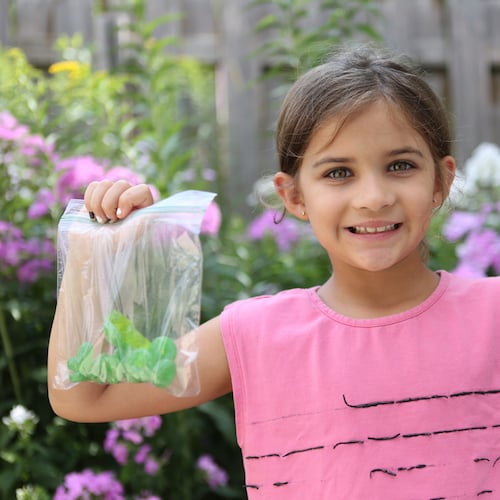
Step 3: Double-bag the candy: Put each color in a small zipper bag, and then in a second zipper bag.
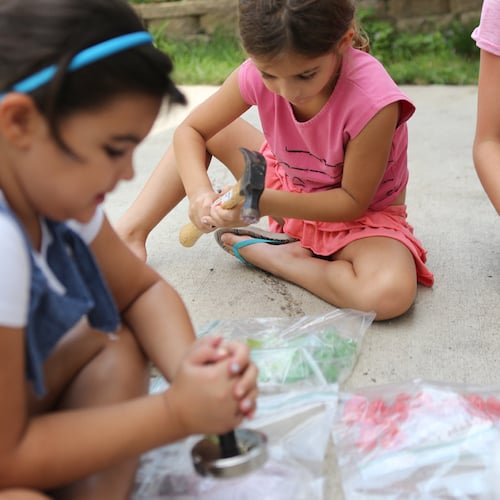
Step 4: Have your child put on safety glasses or sunglasses and use a hammer or meat pounder to crush the candy on a hard surface. Ask her to describe it again. Does she think she can make it look clear again? How?
Step 5: Store the crushed candy in the freezer until you’re ready to use it.
Step 6: Take a baking sheet outside and coat it with cooking spray. (Ideally, an adult should do this.)
Step 7: Let your child arrange the cookie cutters on the baking sheet and then spray them lightly with cooking spray.

Step 8: Encourage your young artist to add crushed candy to the cookie cutters. Ideally, it should be around ½ inch (1.5cm) thick, but it doesn’t have to be perfect. Ask what he thinks will happen when the candy melts. Will the colors combine? Will the candy look clear again? Will the small pieces stick together?
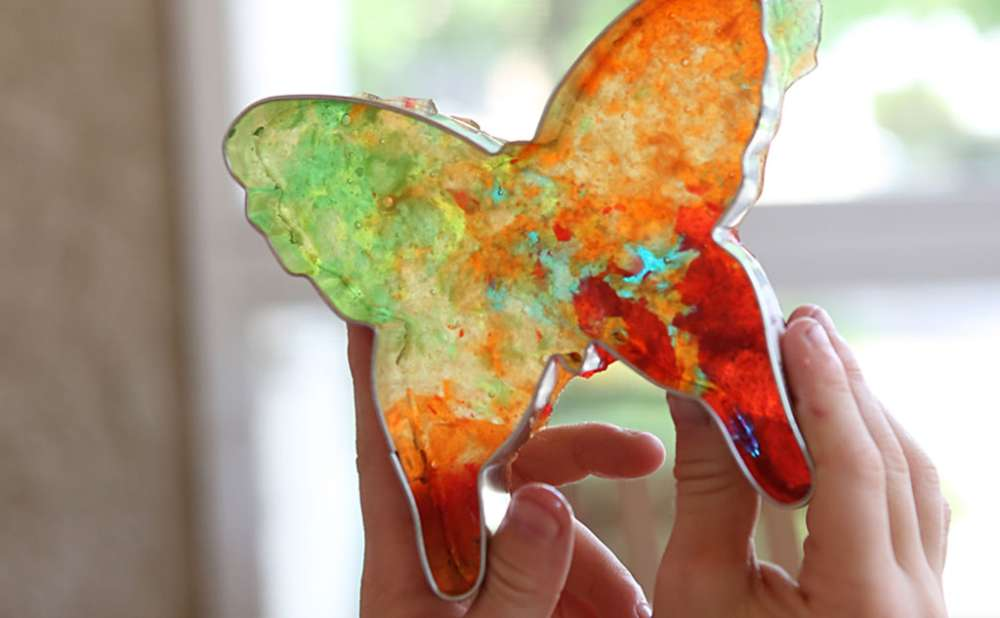
Step 9: Put the baking sheet in the pre-heated oven for around 5 minutes, or until candy has melted and looks like stained glass. Don’t over-melt it or the candy will run out under the cookie cutters.
Step 10: Remove the baking sheet from the oven and keep it away from small children until the candy has cooled.
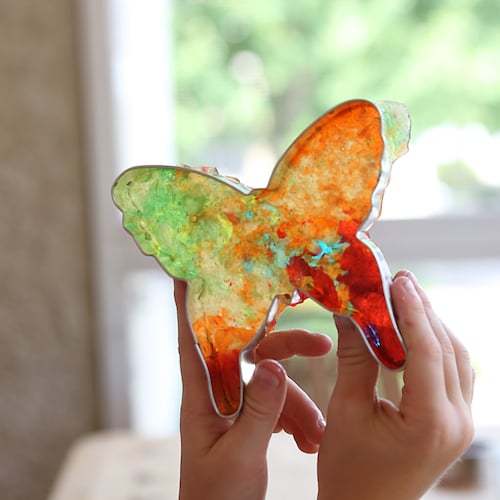
Step 11: When the candy is cool to the touch, help your child remove his masterpieces from the cookie cutters. Like real stained glass, it will be fragile and some may crack when you remove it. Ask your child whether the candy stained glass looks the way he expected.
Step 12: Let your young food scientist taste his creations.
The STEAM Behind the Fun
Clear, hard candy has what food scientists call a “glass structure.” When hard candy is made, corn syrup (made of sugars called glucose and fructose) is added to melted table sugar (sucrose) to keep the sugar molecules from getting organized into crystals. The crystals can’t form because the long sugar chains in the corn syrup get in the way.
True stained glass has been around for over 500 years. Unlike hard candy, real glass is made from silicon dioxide, the main component of sand. Like hard candy, glass has a non-crystalline structure and it is made by adding colorful metallic salts to melted glass before it cools and solidifies. The colored glass is then cut and the pieces are attached to one another inside a frame using melted metal, like lead. Good engineering is essential to creating stained glass designs that will stand the test of time, weather, and gravity.
---
This project and more like it are featured in Liz’s new book STEAM Lab for Kids: 52 Creative Hands-On Projects Using Science, Technology, Engineering, Art and Math (Quarry Books, spring 2018).
© Quarry Books, 2018/ Steam Labs for Kids
Photos Credit: © Quarry Books