
This colorful, step-by-step project combines art and science to teach kids about plant pigments. You'll collect fall leaves with your child, and use a hammer or mallet to transfer their colorful images to cloth.
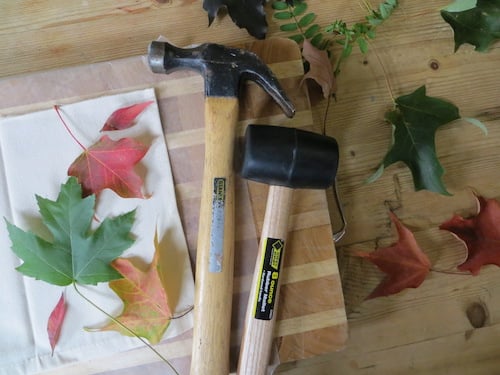
What You’ll Need
- Fresh leaves (Dry leaves won’t work very well.)
- A hard, smooth pounding surface, like a wood cutting board or carving board
- Wax paper or plastic wrap
- Mallet or hammer
- Untextured cotton cloth, like a dishtowel. (Heavy cloth works better than very thin cloth. To make colors last longer, you can buy fabric pre-treated for drying.)
Safety tips: Protective eyewear is recommended. Young children should always be supervised when using mallets and hammers.
What to Do
Step 1: Take your child on a nature walk. Look at the trees together and talk about what color the leaves are. With your child, collect colorful green, red, yellow, and brown leaves from low-hanging branches or the ground. Collect flower petals as well, if you find them on the ground.
Step 2: When you get home, help your child cover your hard pounding surface with waxed paper or plastic wrap.
Step 3: Let him cut a piece of cloth that will fit on the pounding surface when folded in half.
Step 4: Iron the fold (optional). Then, open up the cloth and lay it on the pounding surface.
Step 5. Ask your child to arrange the leaves and flowers on one half of the cloth.
Step 6: Fold the cloth over the plants. If you like you can tape it down (but this is optional).
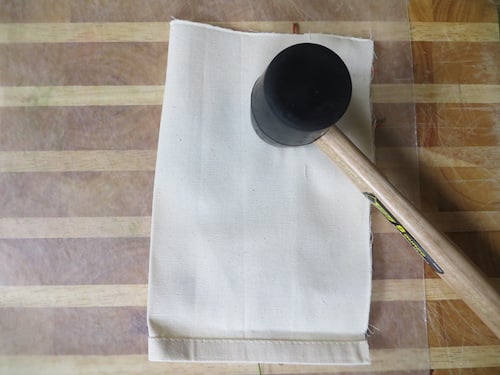
Step 7: Show your child how to safely pound the cloth with a hammer or mallet.
Step 8: Let your child take over. As the pigment leaks through, you’ll see the outlines of what you’re smashing. Keep pounding the fabric until the forms of the leaves are visible through the fabric. Hint: Hammers work better than mallets for fall leaves. For juicy leaves, like tomato plants and flowers, use your mallet or hammer very gently.
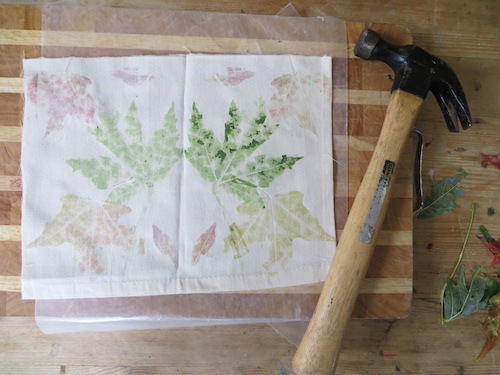
Step 9: When your child is finished pounding, let him unfold the fabric to reveal the print he created. Remove the leaves and petals.
Step 10: Your child can label the image with the plant names, enhance the image with paint or markers, or leave nature’s design to speak for itself.
The Science Behind the Fun
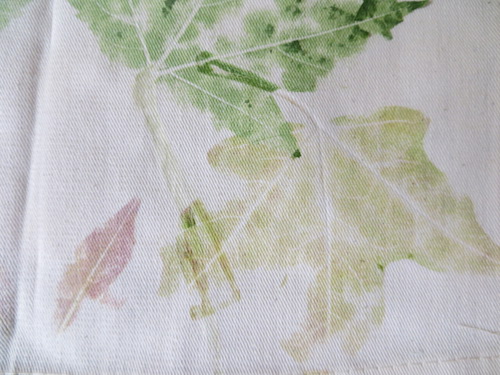
Pigments are chemicals that give things color. Leaves, fruits, and vegetables are full of them. The green pigment found in leaves is called chlorophyll. In the fall, many trees stop making green chlorophyll, and the red, yellow, and orange pigments inside the leaves are easier to see.
In this experiment, your child bursts plant cells using pressure from a hammer or mallet. The colorful pigments released by the plant are soaked up by the cloth, leaving an image of the leaf or flower your child pounded.
Enrichment
What kind of leaves did you collect? Use a leaf-identification app to learn what kind of tree each leaf came from.
What parts of the leaf can you identify in the print you created? Can you see veins in any of the leaf prints you made?
You can find more experiments like this one at kitchenpantryscientist.com, and in my books Kitchen Science Lab for Kids (Quarry Books) and Outdoor Science Lab for Kids (Quarry Books).