
When most people think about woodworking for children they picture the final product – maybe the birdhouse or the napkin holder. But a typical woodworking project is about much more than the product. It's about the processes and the practices that make up the steps of the project.
Woodworking does not have to be for adults and teenagers only. A good way to introduce woodworking to young children is to explore the processes using real tools and real processes, and practice these before you start to build anything. It is also important for young children to practice a skill many times over to get the hang of it.
Here are some tips and tricks for parents and educators for using tools and woodworking materials with a younger audience.
Safety
Safety is the most important aspect of woodworking. Whether you are four or 40 years old, safety is key.
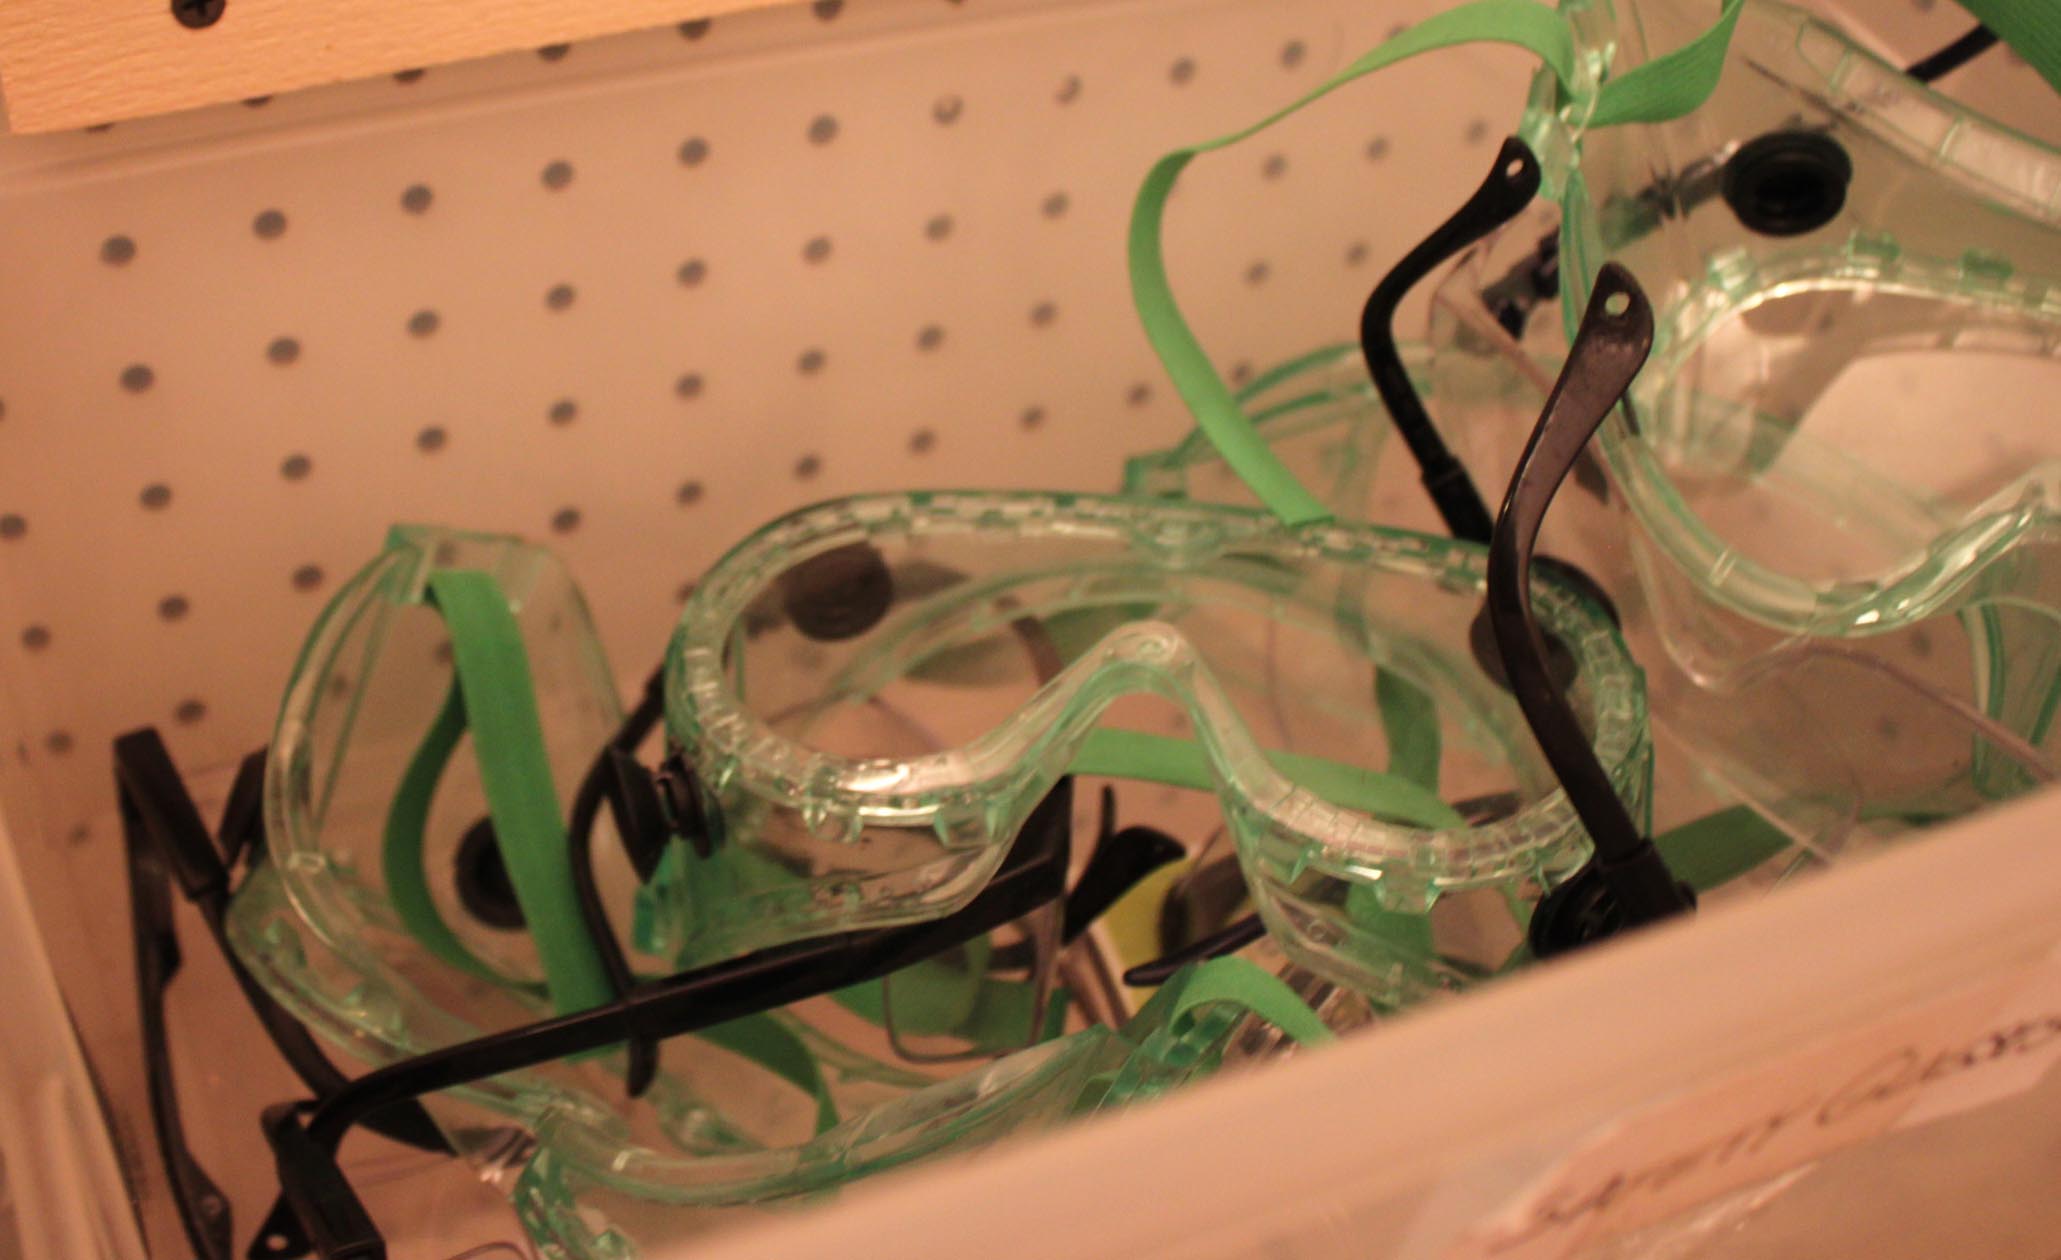
• Always wear safety goggles or glasses when working with any tool. Goggles come in sizes from adults and children, so find a pair that fit each child well and will not fall off while working.
• Patience is another important safety aspect. Don't rush through steps. A woodworking project can take a long time.
• Have a clean and organized workspace to avoid missteps and distractions. When exploring woodworking with very young children, you can even work directly on the floor instead of at a table.
Tools
It is important to use real tools. Plastic tools do not teach children how to accurately manipulate a real tool.
Clamps
These might be the most important tools you will use in woodworking. When it comes to safety, clamps can be your best friend.

• There are all kinds of clamps and vices; familiarize yourself with as many types as you can, and their uses.
• The most basic clamp you will encounter is a "C" clamp. This is a great tool for temporarily attaching a piece of wood to a surface, freeing up both your hand so that you can focus on your tool and task.
Shaping Tools
Sandpaper
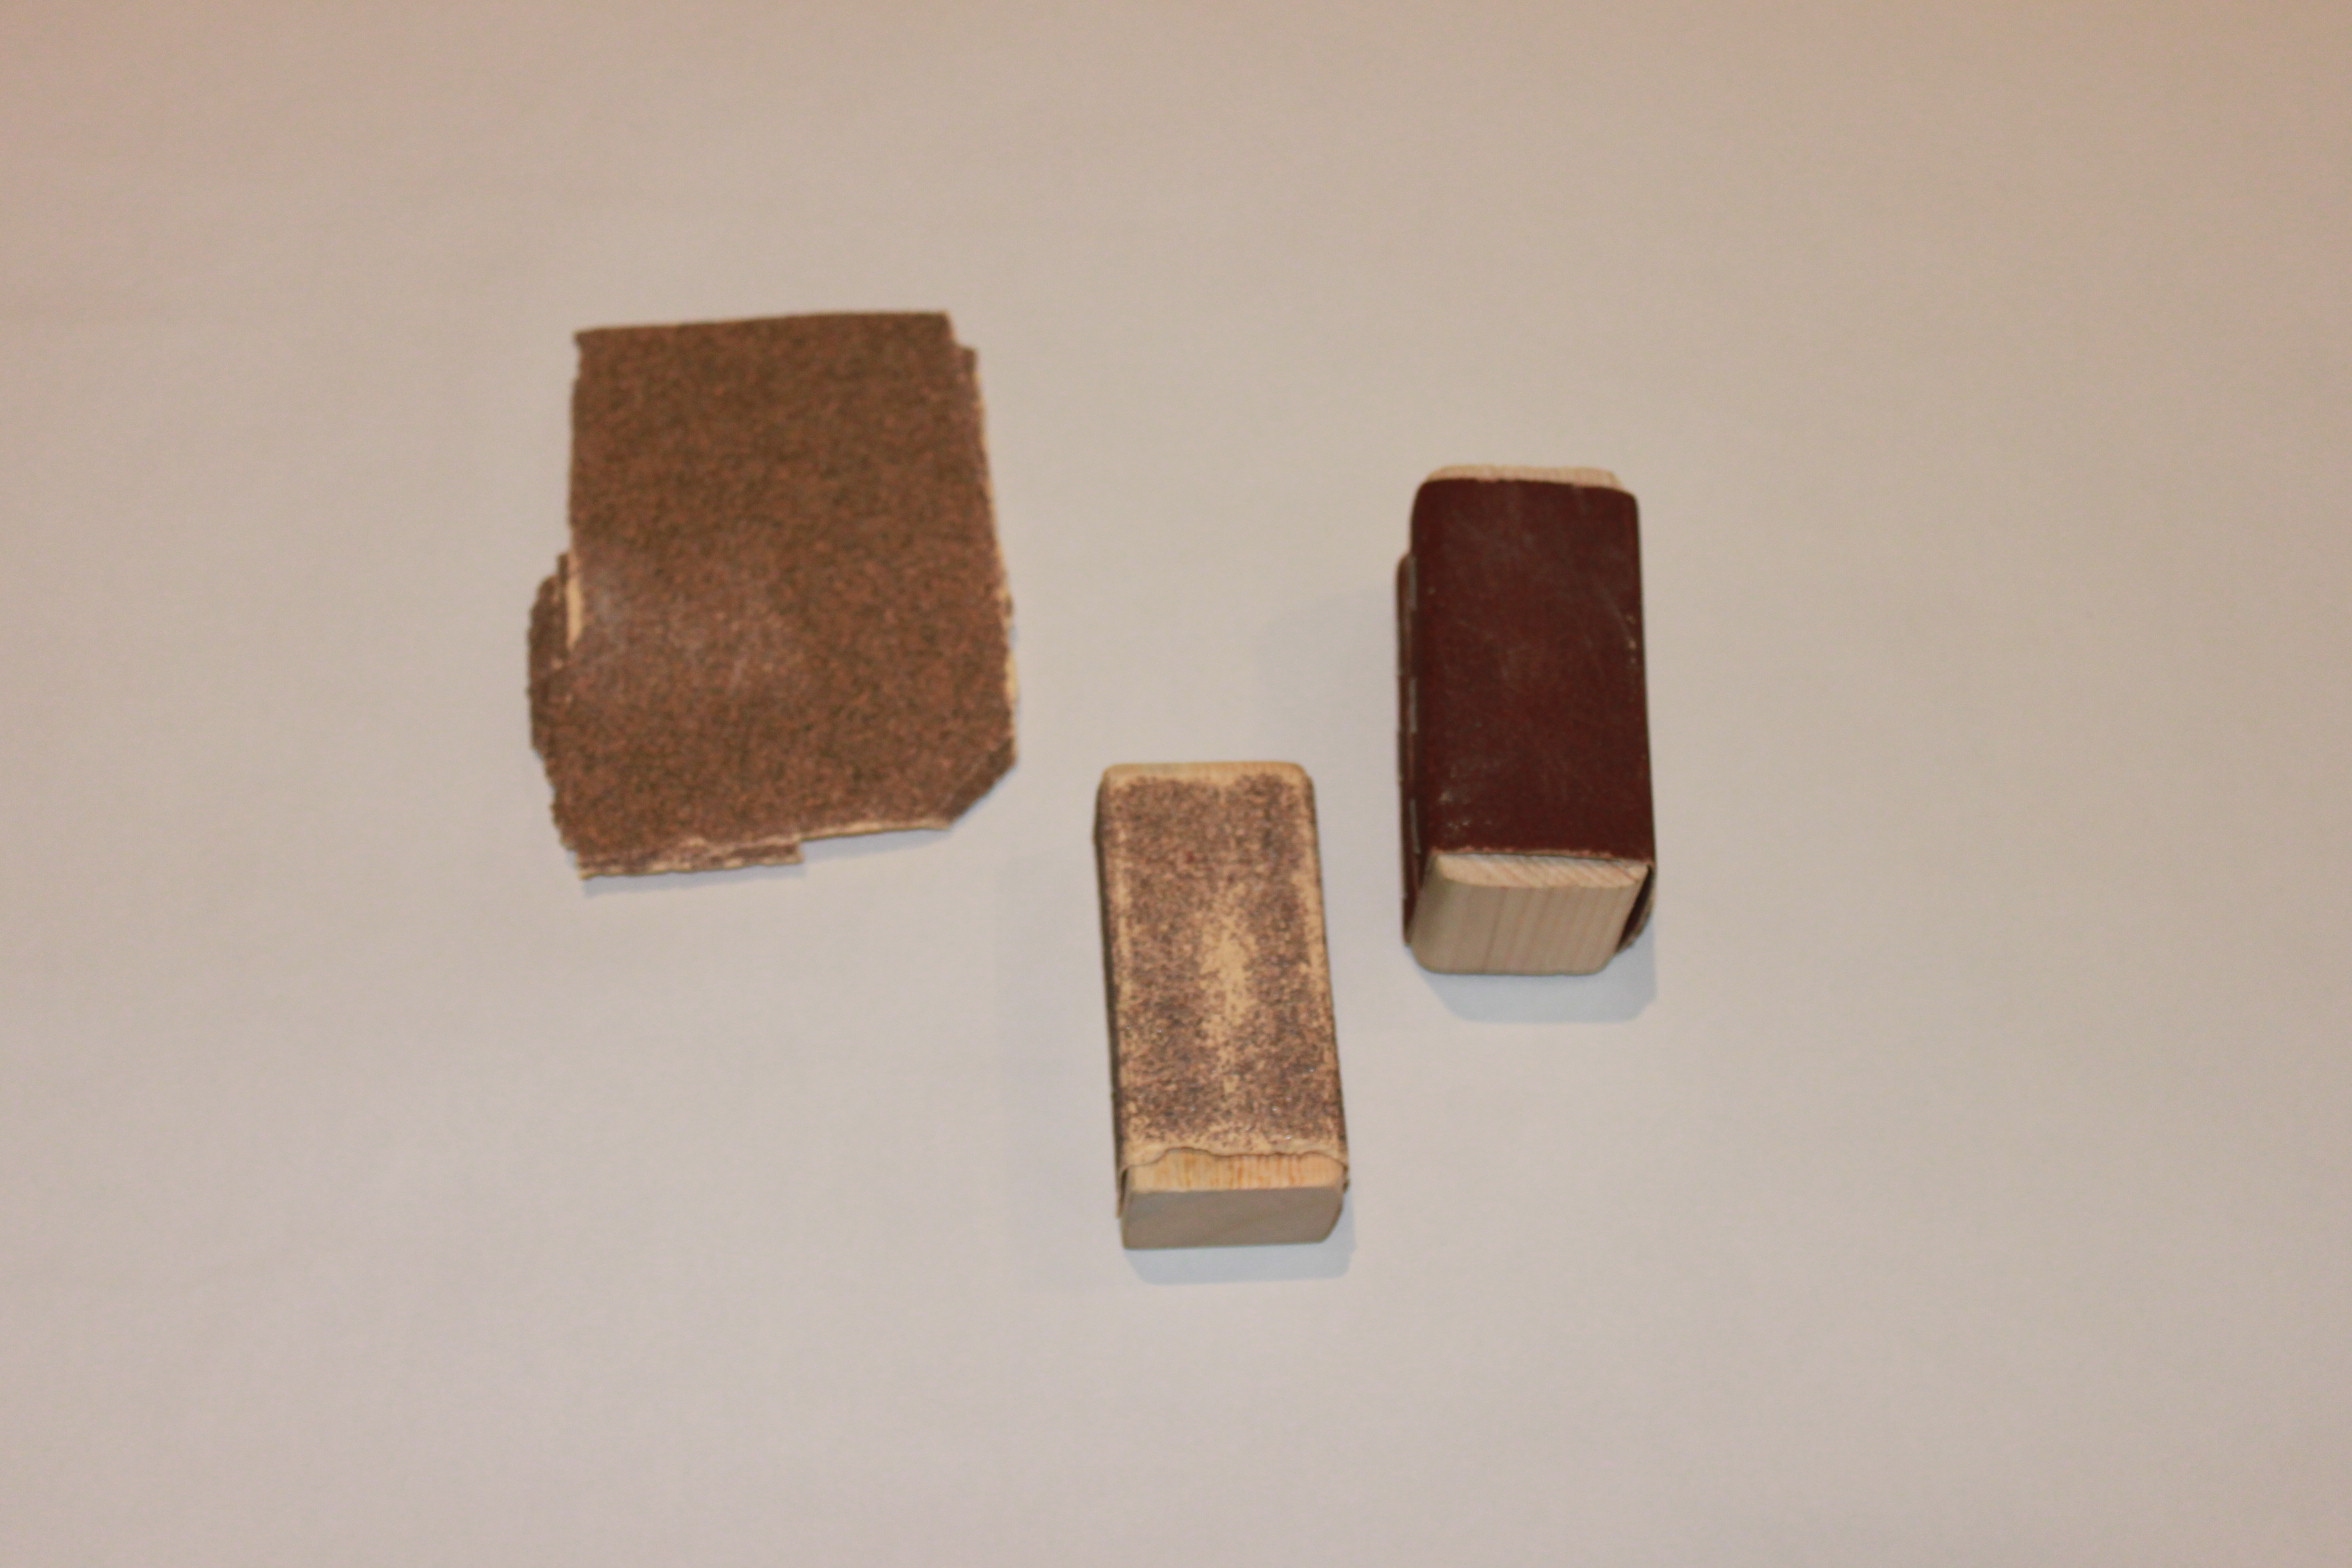
Sandpaper is one of the best introductory tools for young children when it comes to woodworking. The texture itself is intriguing to most children. Its purpose is evident when children are shown that sandpaper can be used to change the shape of a piece of wood.
• An extremely engaging activity is to let children sand scrap pieces of wood.
• Wrap a piece of sandpaper around a block of wood to help children get a better grip while using it.
• Clamp the piece of scrap wood to a surface to allow children to focus on the action of sanding back and forth.
• Sandpaper creates a lot of dust, so be sure to sweep up after you are done.
Attachment Tools
Hammers

A hammer is a tool used to attach materials together, often wood.
• Find smaller hammers for young children.
• Explain the parts of the hammer at first; the handle lets you swing it, the flat end hits the nail, and the claw (which is sharp) is used to pull nails out of wood.
• Show children how to properly hold a hammer.
• Let them practice hammering nails into a soft piece of scrap wood (an old tree stump works great). Again, patience is key. Children may get frustrated when the nail ends up crooked. Simply tell them and show them that practice helps.
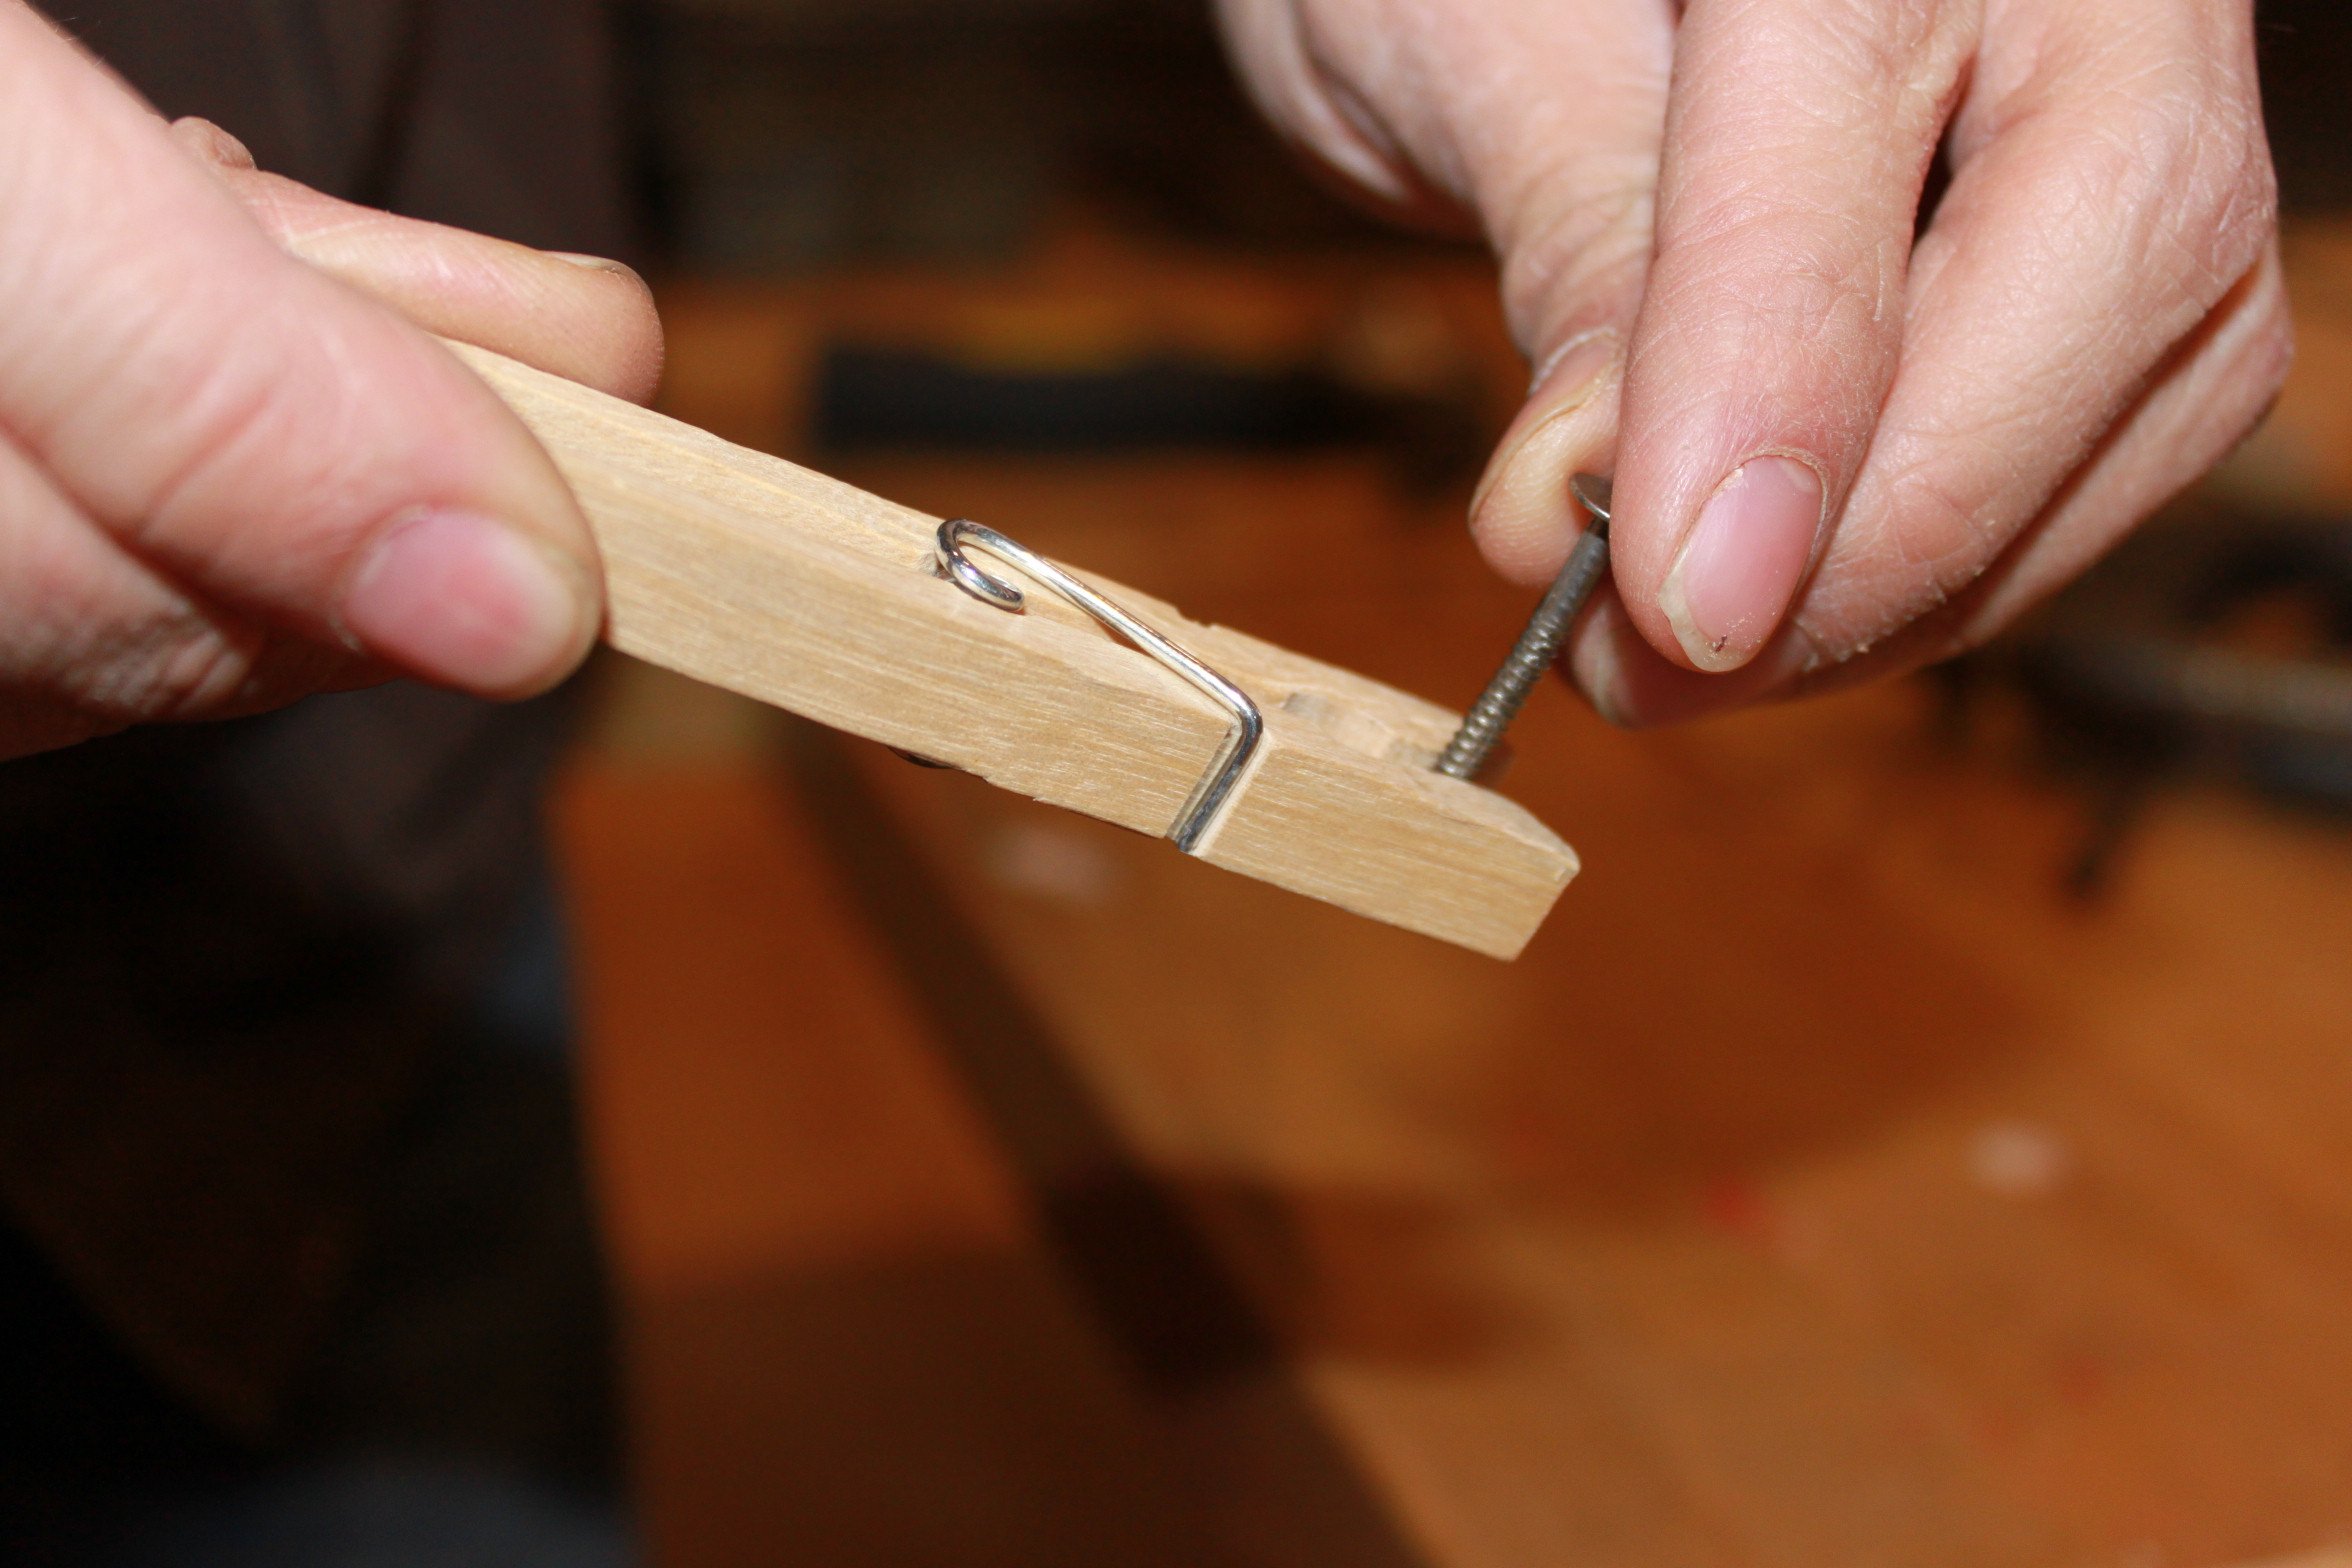
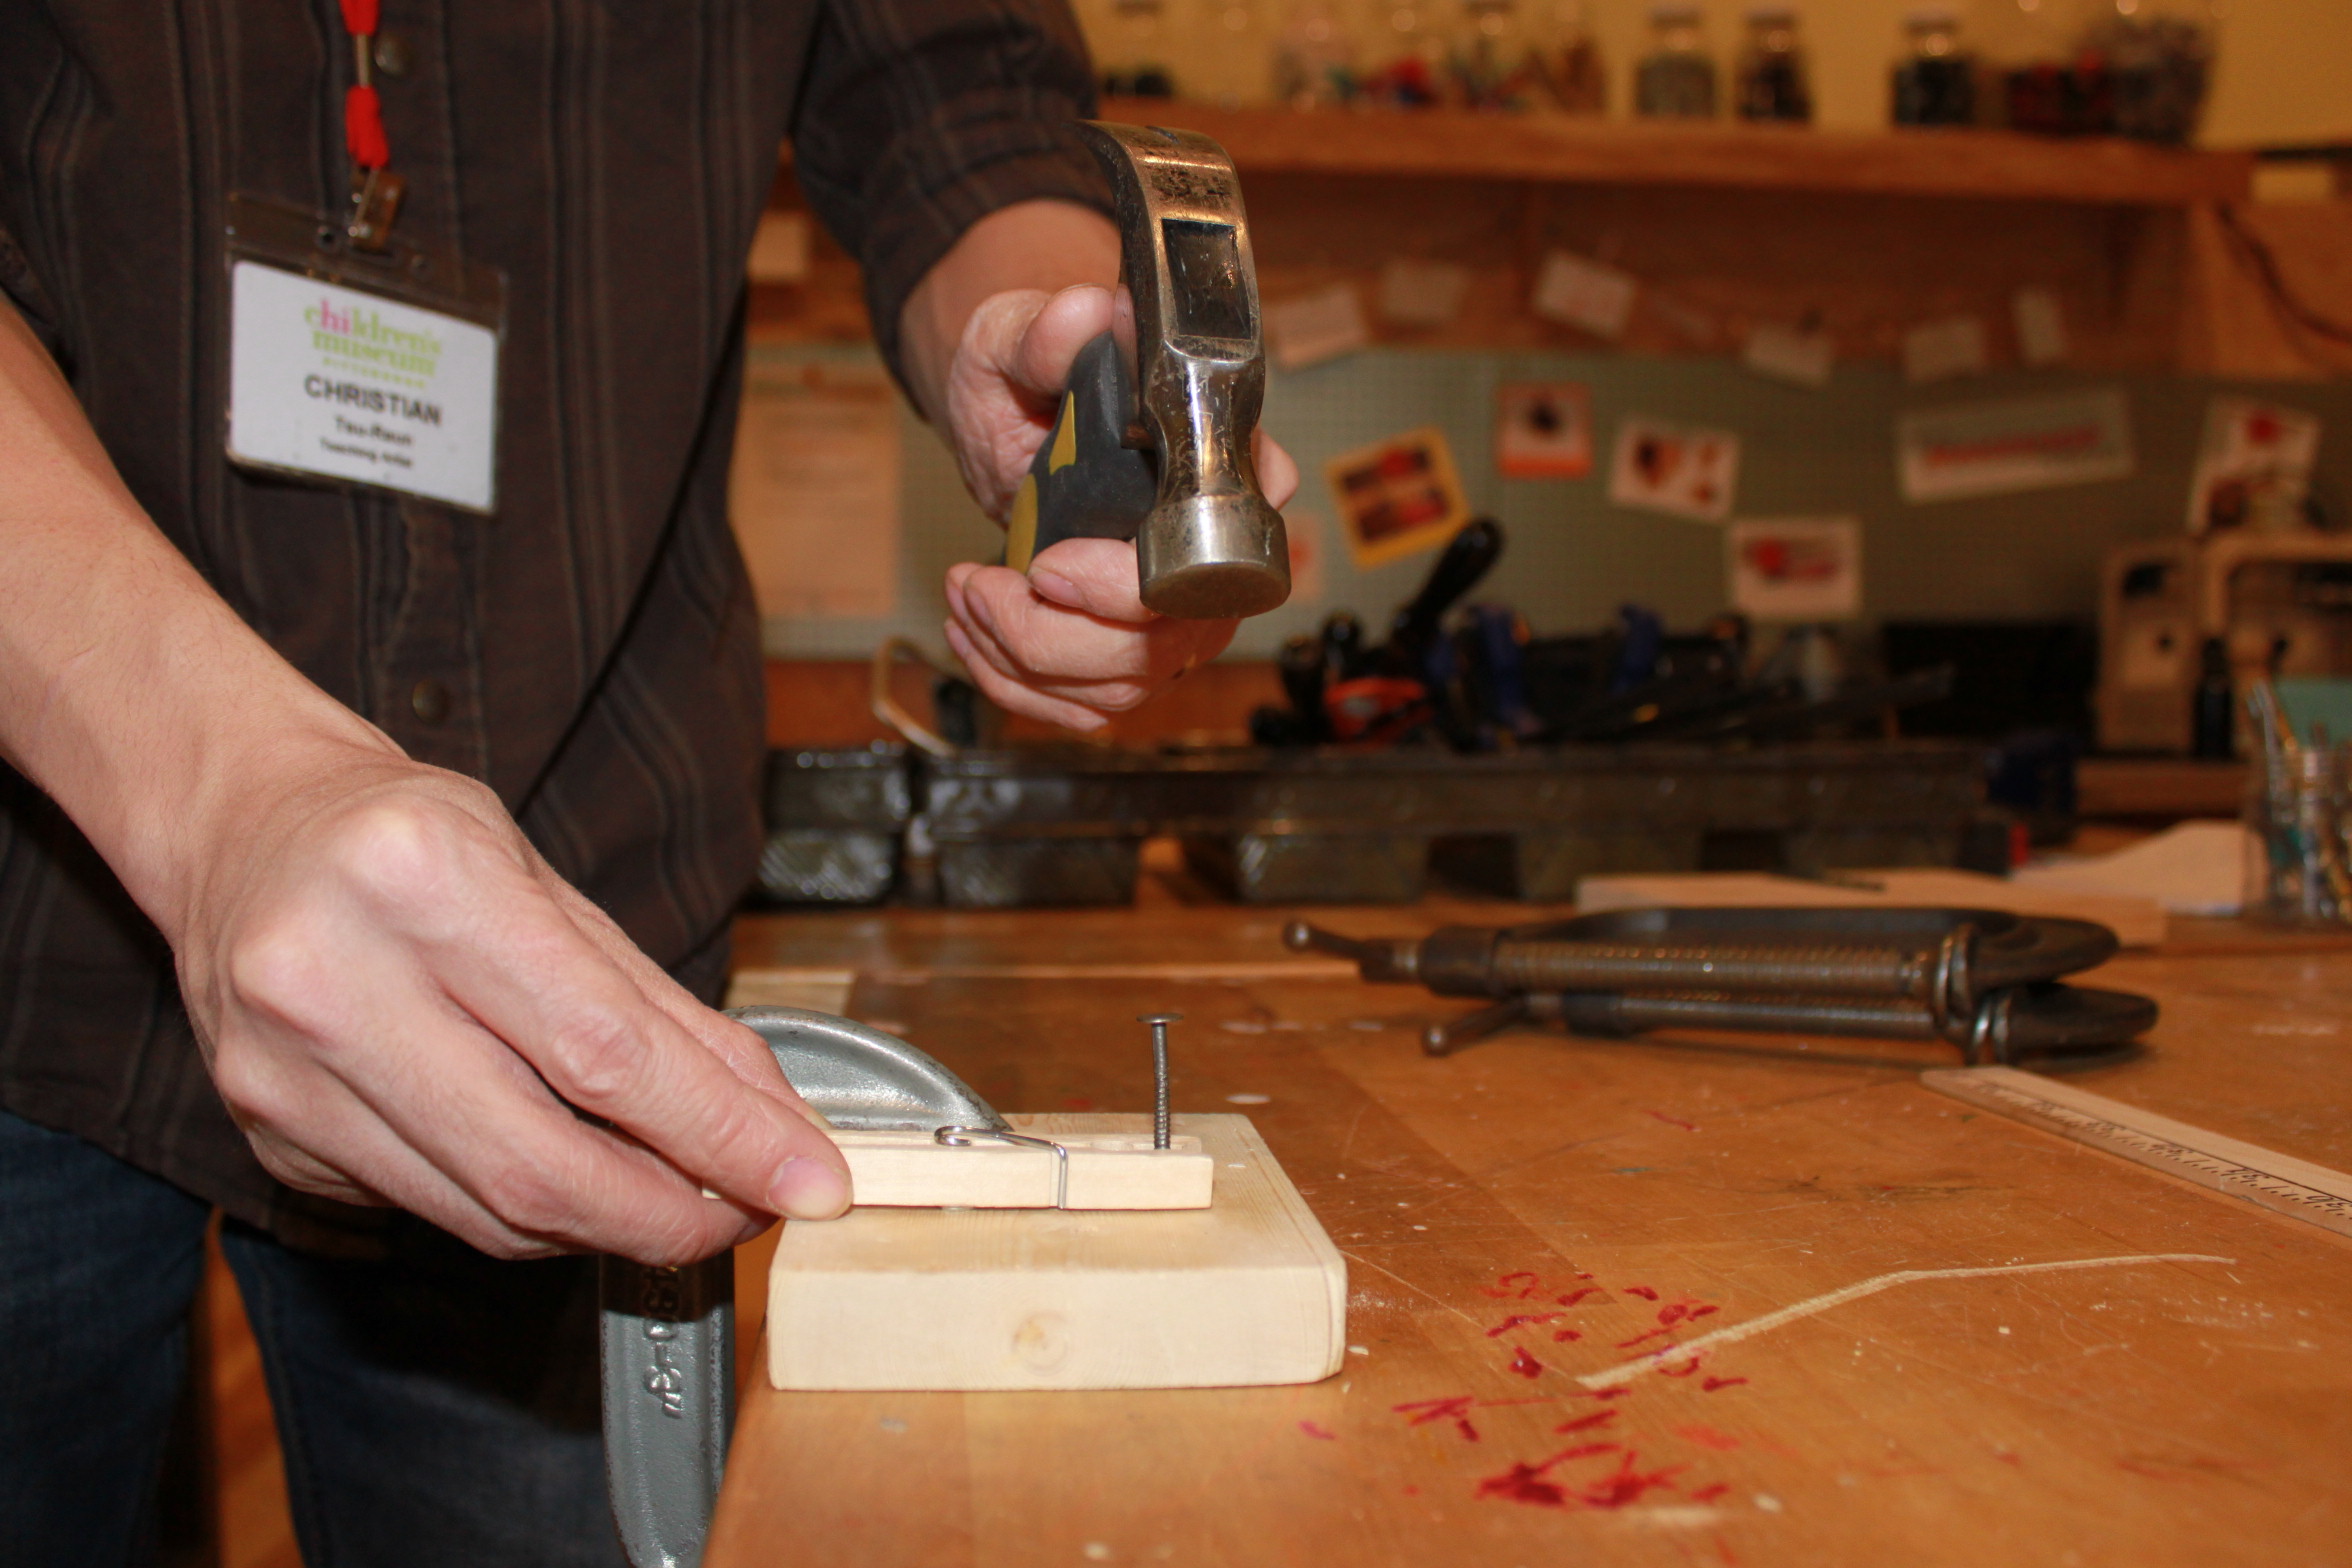
• How to hammer a nail without hitting your thumb: The most common complaint when using a nail and hammer is the inevitable hitting of your thumb with the hammer. To prevent this, use a simple clothespin to grasp the nail near its base, as an extension of your fingers. You hold the clothespin and the clothespin holds the nail, so even if you miss the nail, you will not hit your fingers. This allows children to practice using a hammer on their own.
Screwdrivers
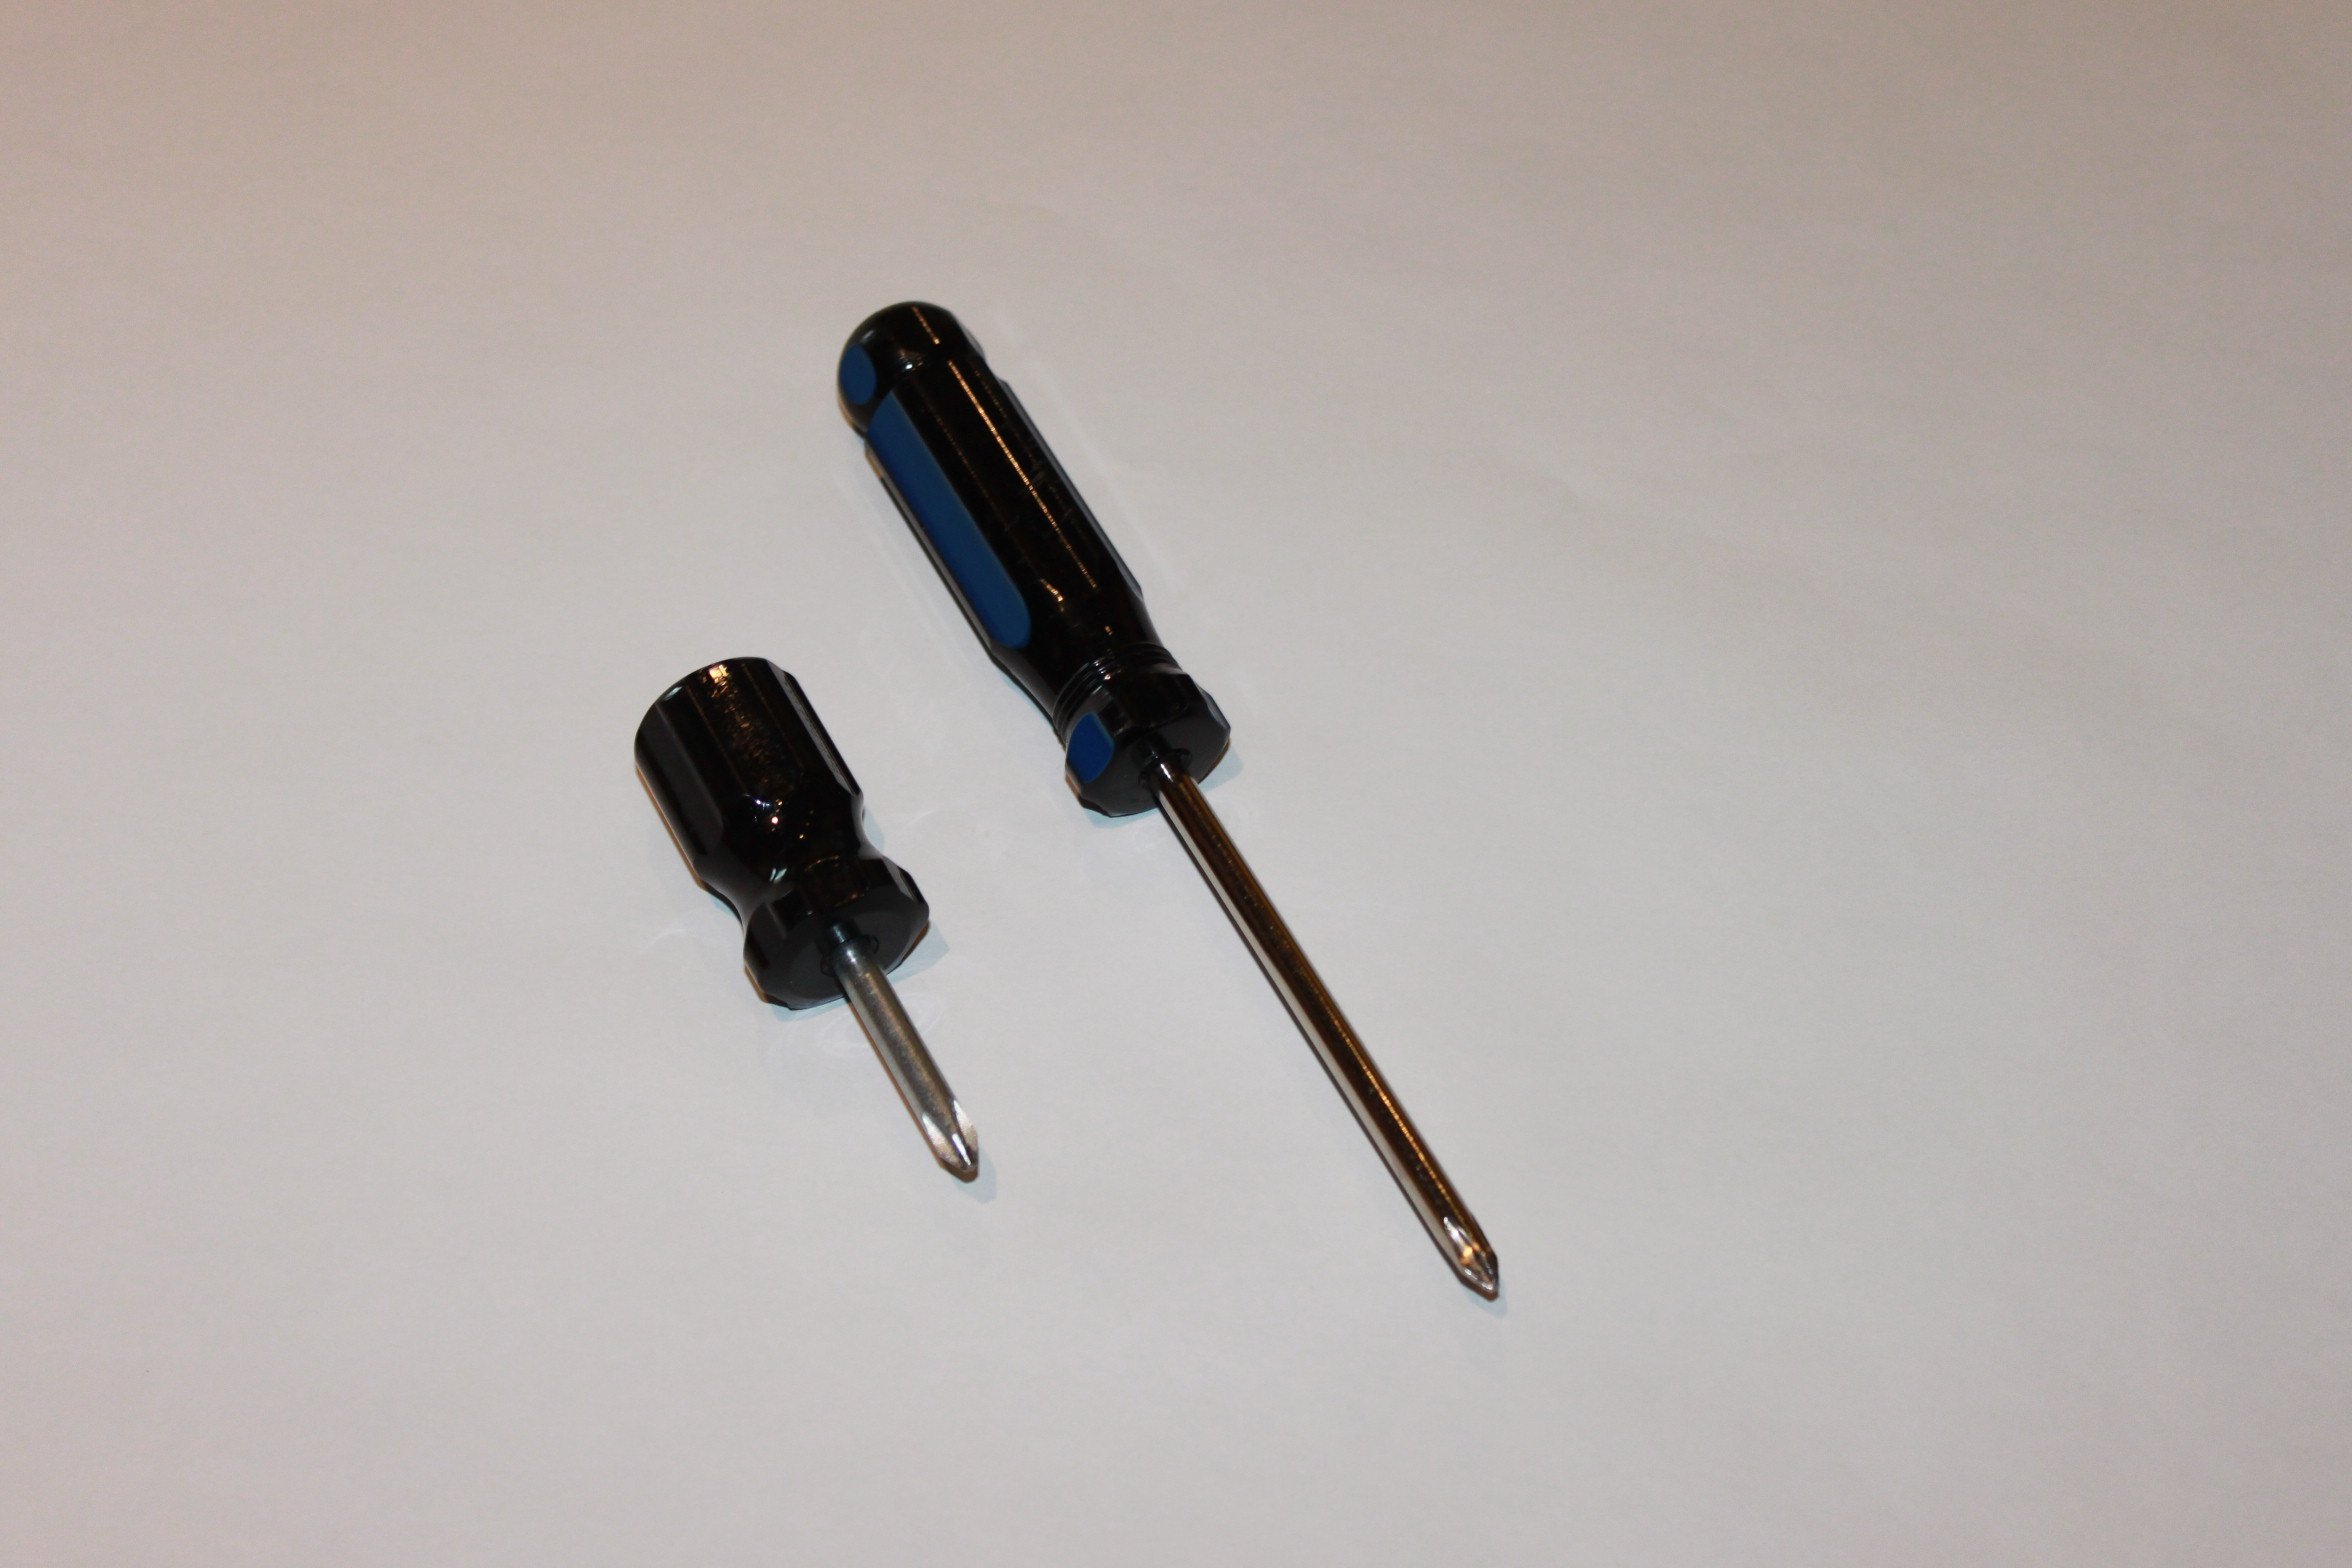
Screwdrivers are also used for attaching wood by turning a screw into the material. Pushing and turning a screwdriver while keeping it steady can be quite a challenge and takes children a lot of time to master.
• Explain to the children what a screwdriver does.
• Show them a variety of screws and screwdrivers, and how different shapes and sizes of screwdrivers match up with different kinds of screws.
• Practice using a screwdriver using a piece of stiff Styrofoam or polystyrene that you can get at most hardware stores or hobby stores. It's a little bit easier to drive screws into this material than into wood, so children can push the screws in and take them out over and over.
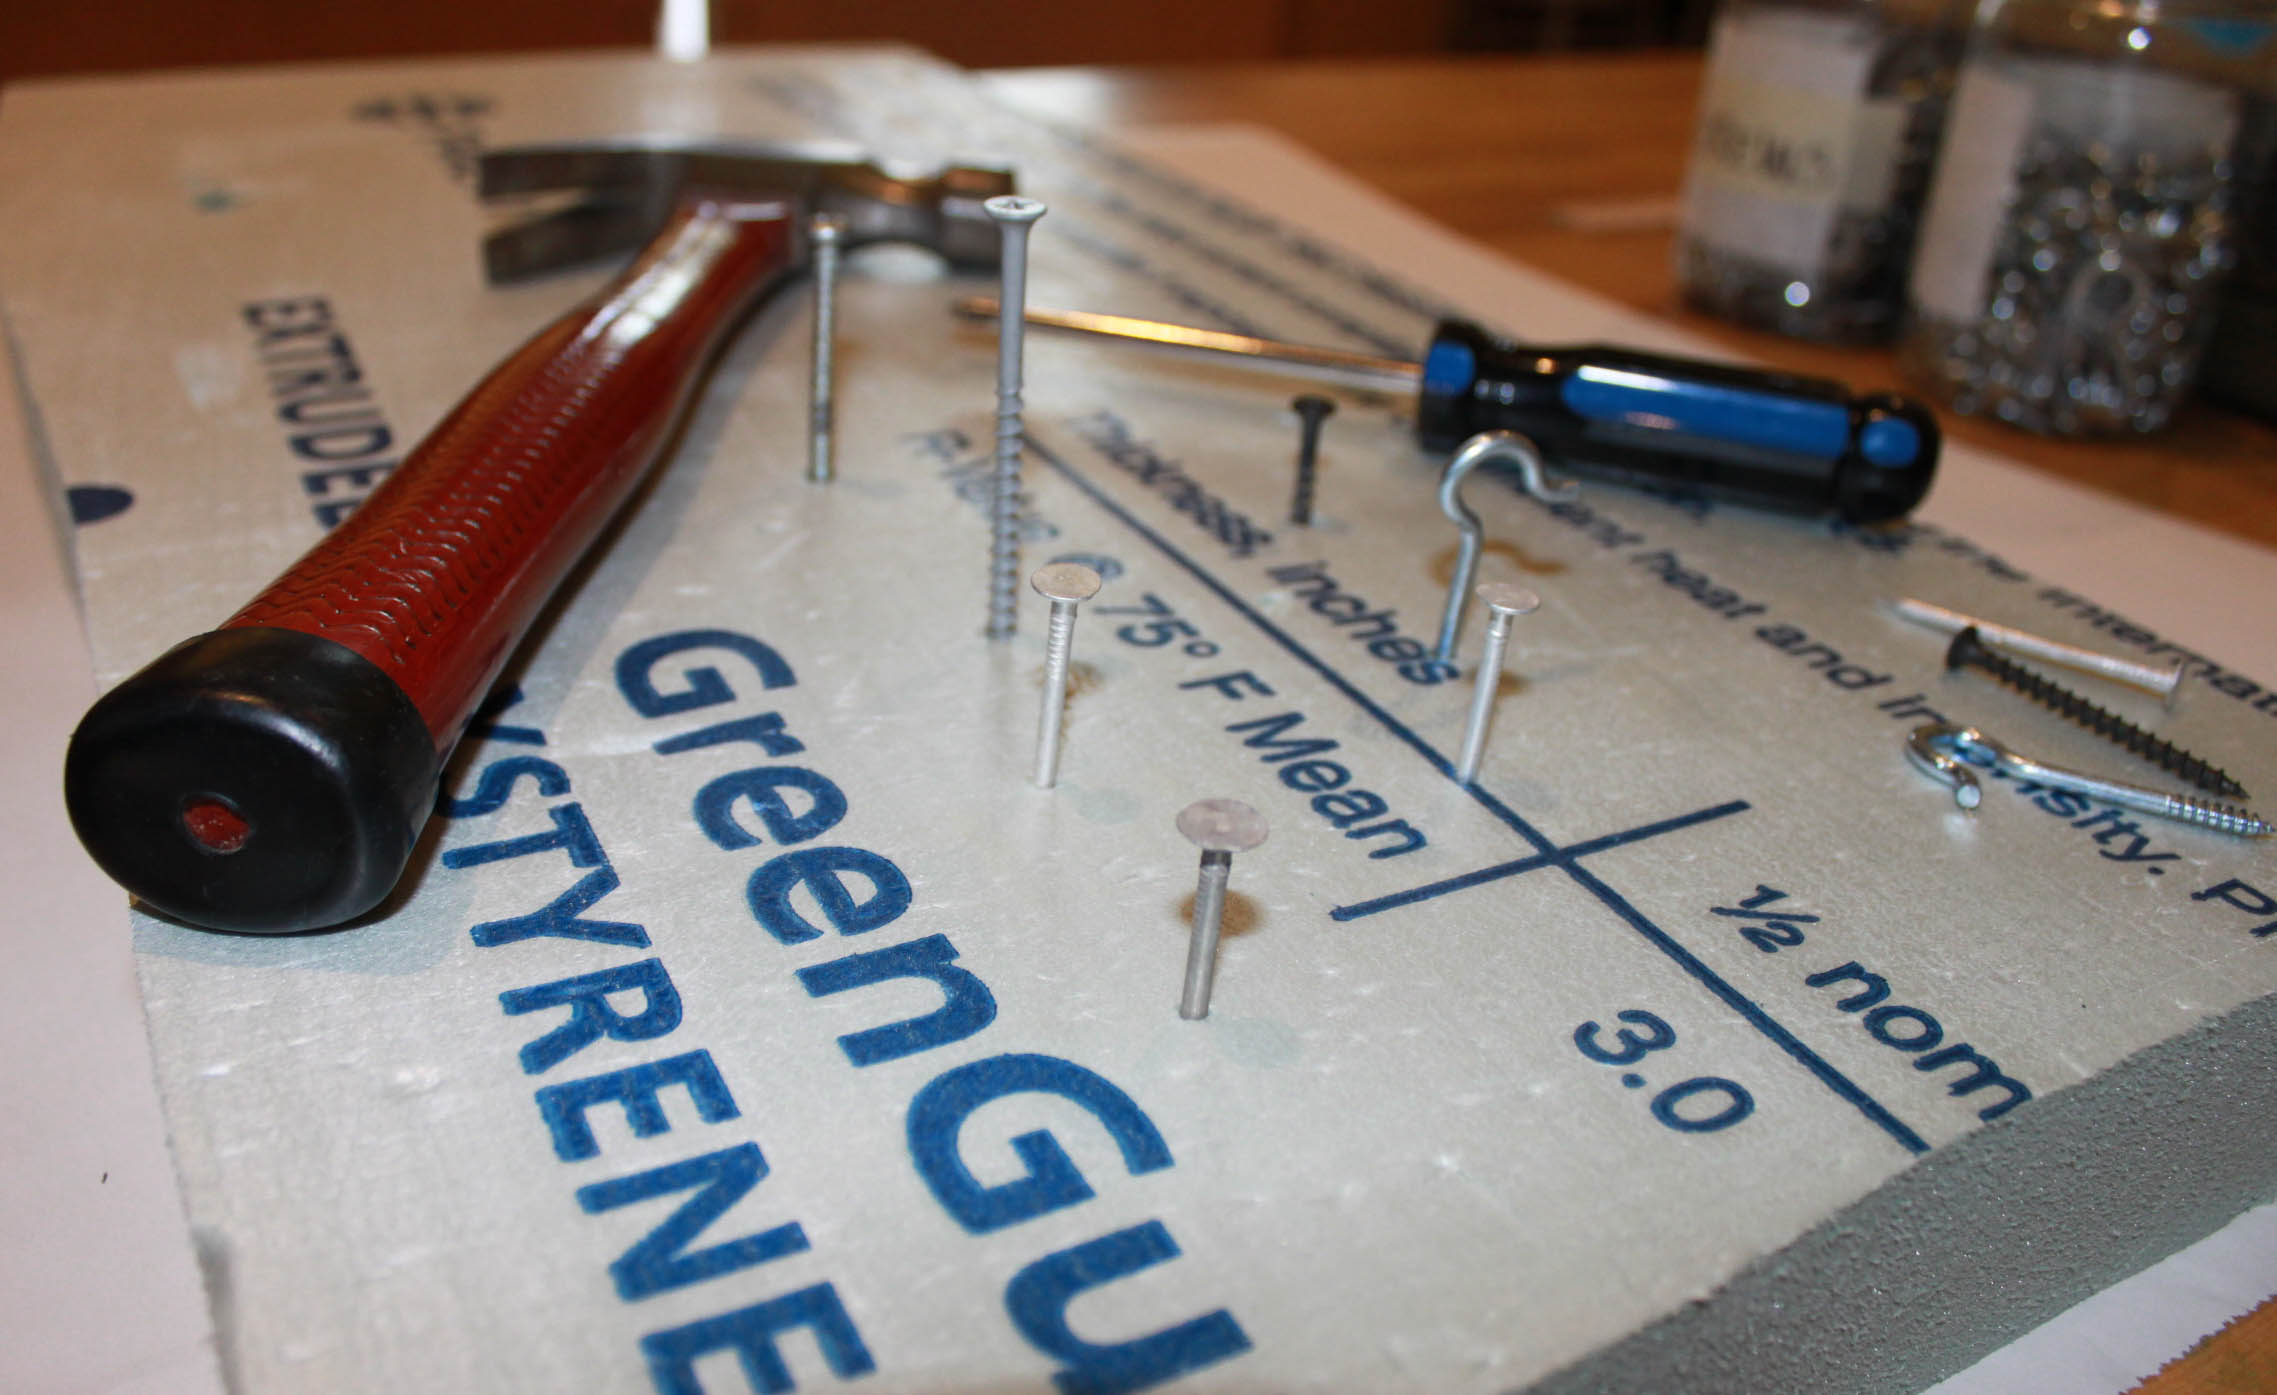
• When you master the Styrofoam practice, let children practice turning and pushing screws into a soft piece of wood.
Prepping Tools
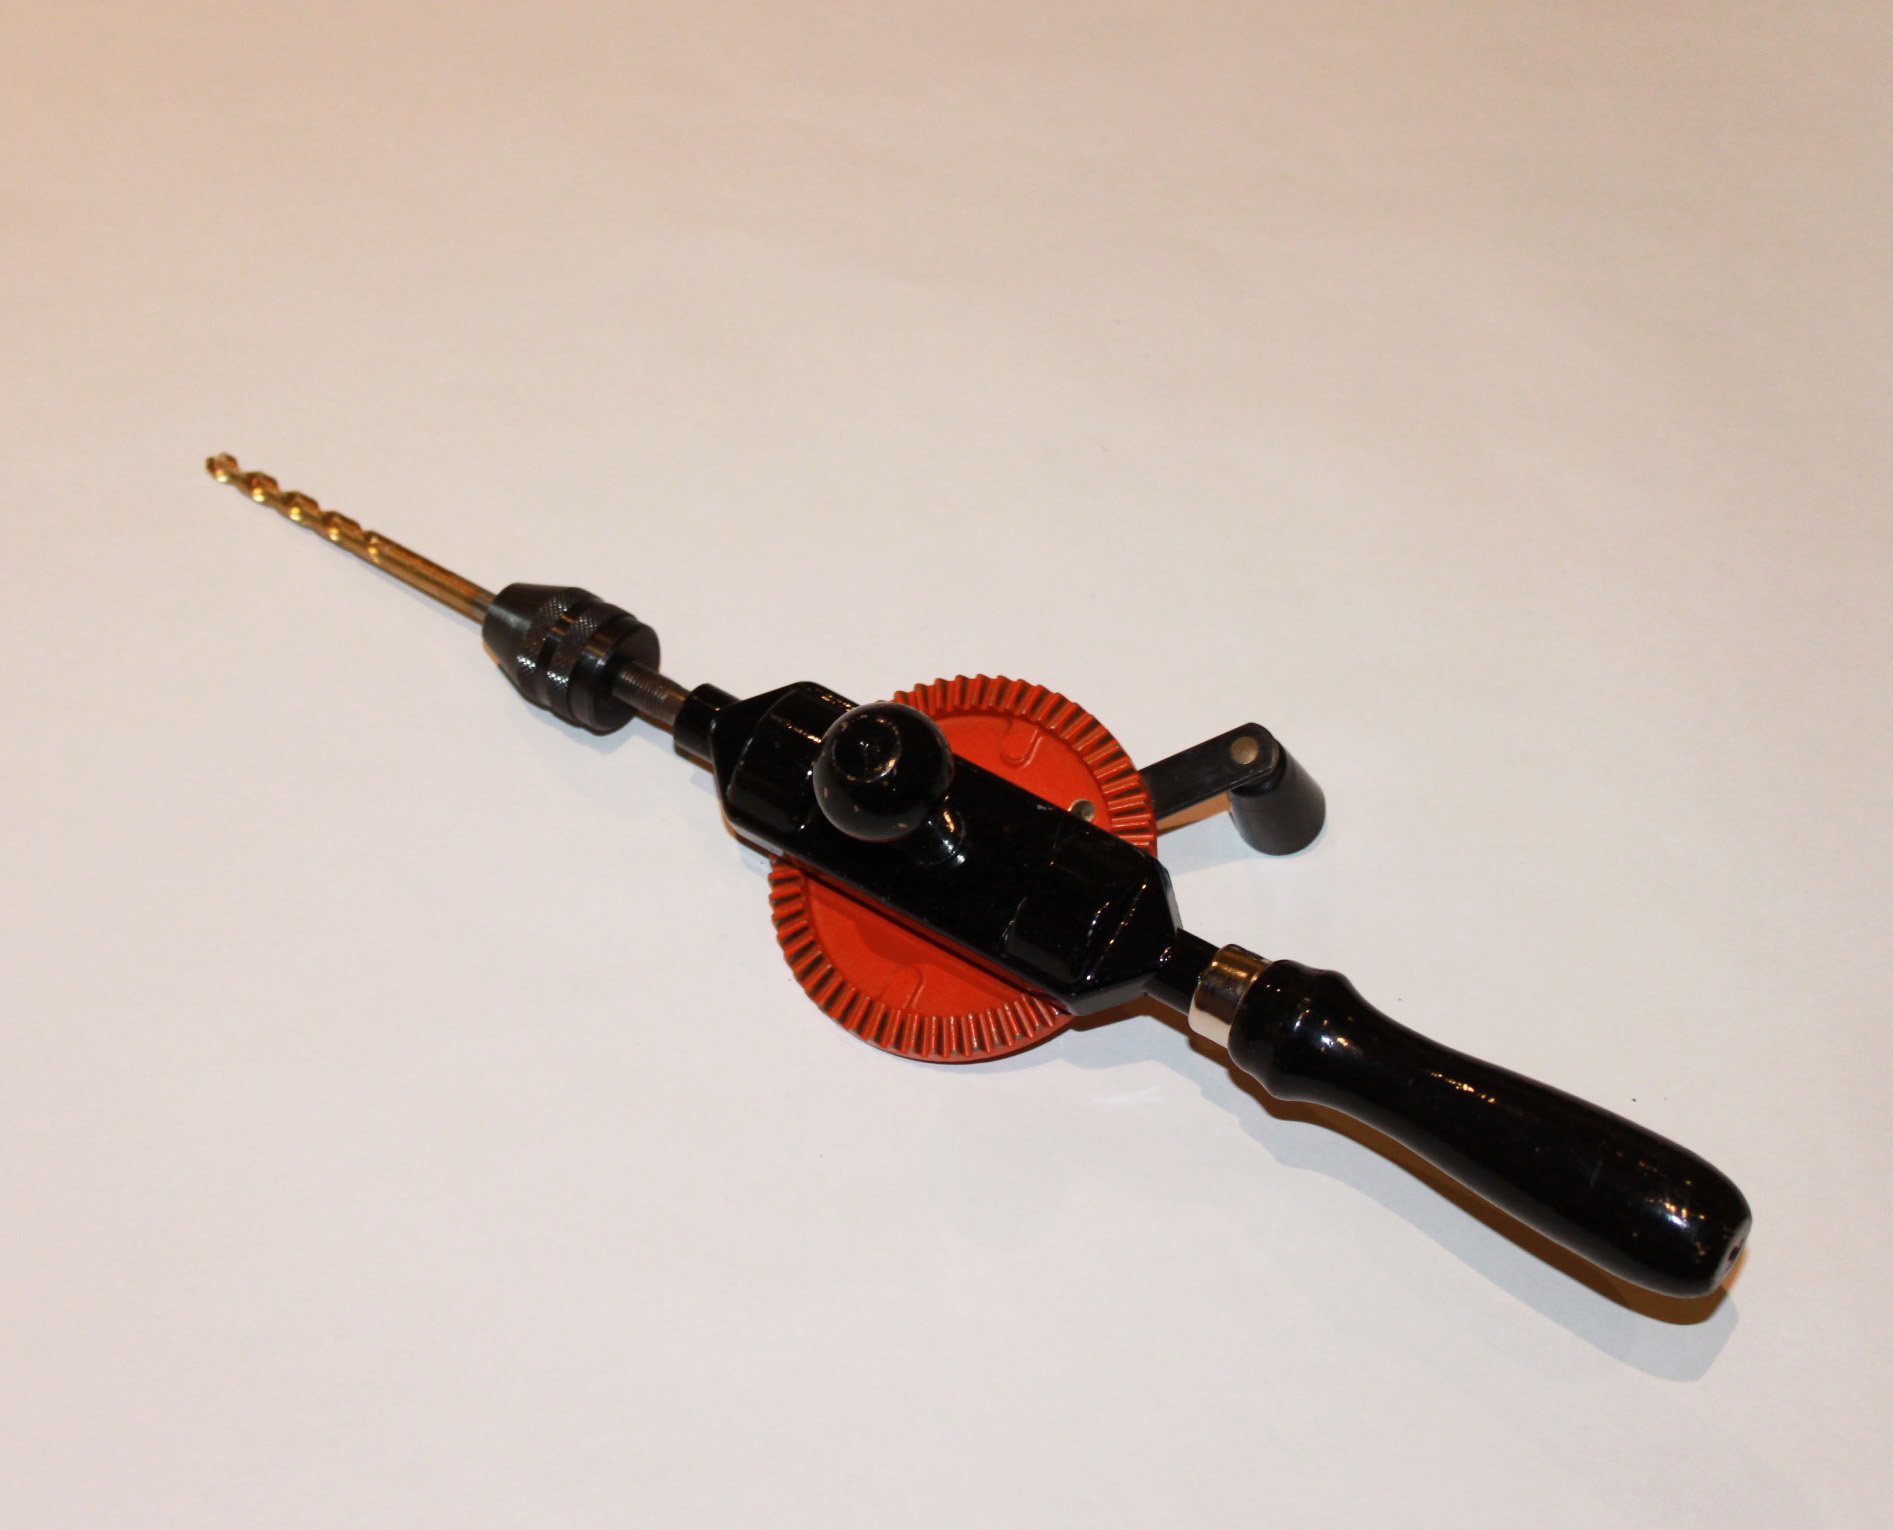
Drills
A drill can drill a variety of holes in wood utilizing different sizes of drill bits. There are two kinds of drills: hand drills and power drills. In either kind, it is very important to explain to children that drill bits can be very sharp and must be handled carefully. Hand drills come in many styles: the "egg-beater" drill pictured above is a very sturdy and efficient model and a great tool to explore.
• Using a hand drill might require some one-on-one assistance with each child; be sure to take this into consideration when exploring tools with a large group.
• To use a hand drill, you first clamp your wood in place. Mark where your hole needs to be, and how big it should be, on the wood with a pencil.
• Let children simply explore drilling holes into scrap wood; be sure to let them try out different sizes of bits as well. As with all the other tools, practice is important.
• Be careful that you don't drill any unwanted holes into a worktable or floor.
• Safety Note: I would not use a power drill with young children. A teacher or parent may find a power drill is vital for quick fixes or to assemble things for your students or children to explore.
Cutting Tools
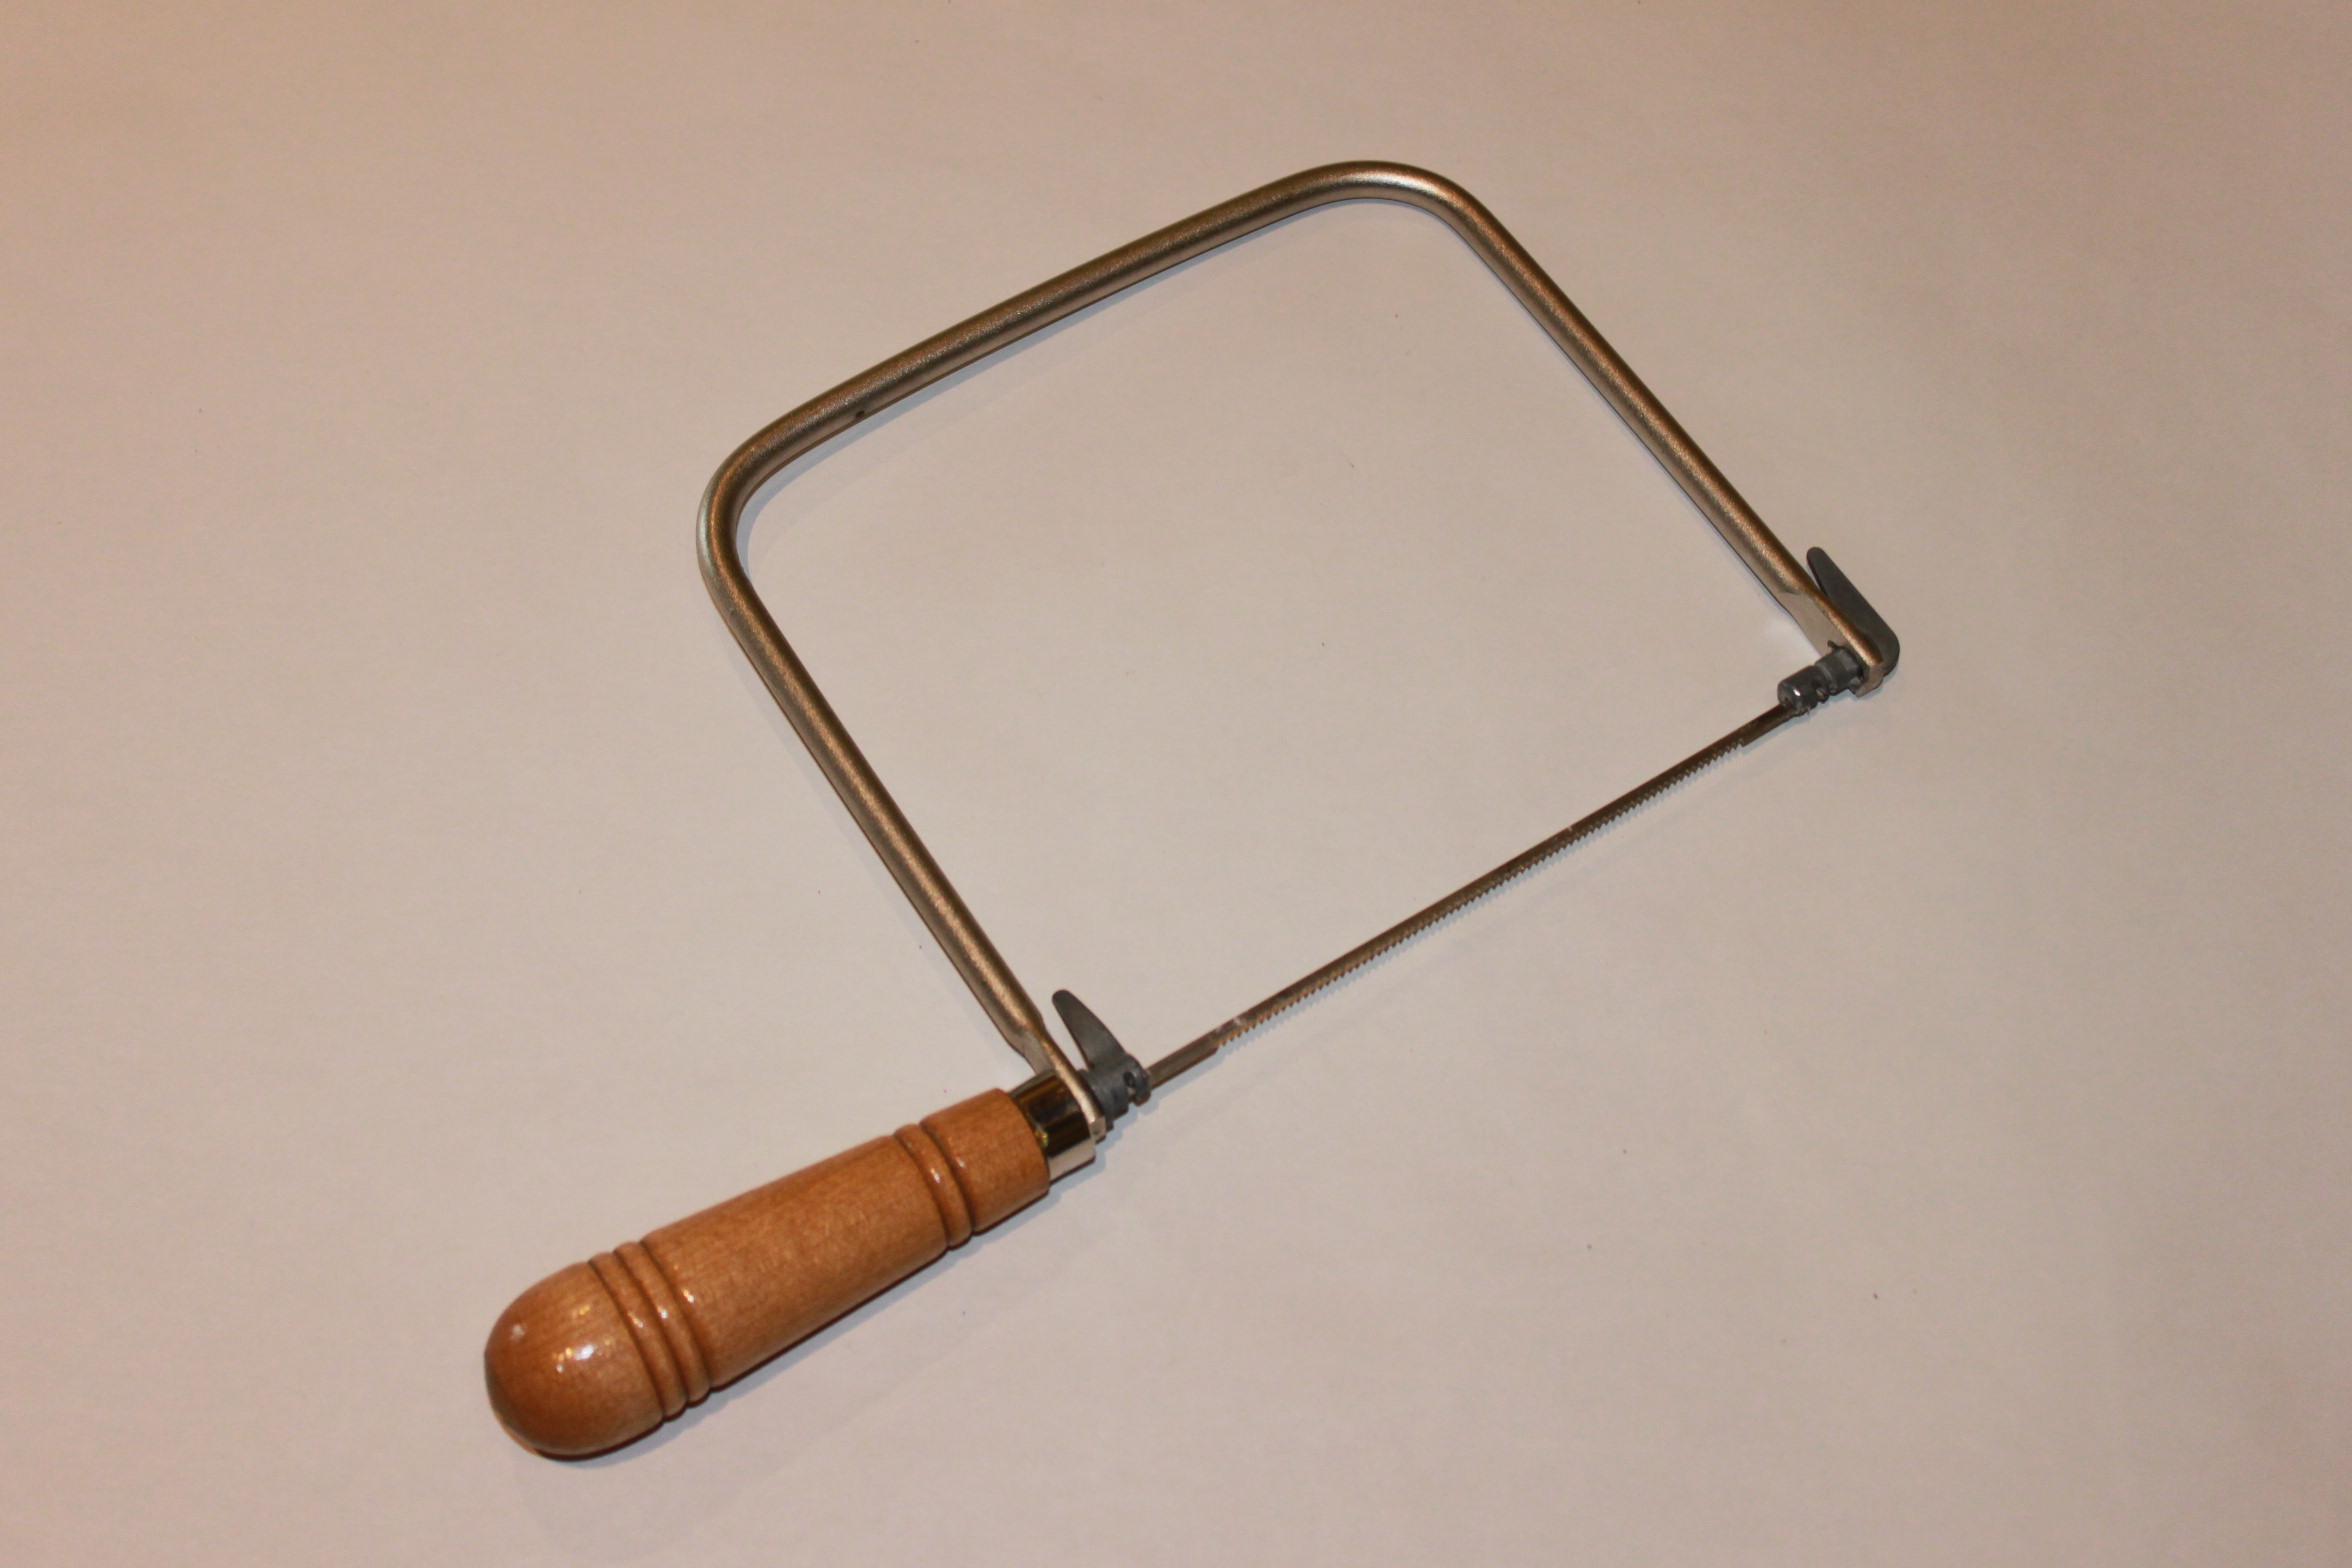
Saws
Saws are important tools. They are sharp and can be dangerous, but they can also be very helpful when used correctly.
• When using a saw with a young child, supervision and safety are extremely important.
• Stress always keeping your fingers away from the blade at all times.
• A small coping saw is lightweight and balanced well for young children to use.
• Be sure to always clamp your piece of wood off the edge of a table. You do not want the wood moving around while the child is sawing.
• Keep both hands on the handle while sawing. It may take a long time, and a lot of persistence, for a child to saw through a piece of wood. The reward is that the child is able to physically alter a piece of wood in a major way. It can be pretty exciting to turn one piece of wood into two.
• Be sure to use relatively thin and soft pieces of wood when you start to practice using a saw.
More Exploration
Let children explore nuts and bolts, hinges, and brackets with a wood board drilled with holes of different sizes. The simple acts of getting a nut onto a threaded bolt can be extremely rewarding to a small child.
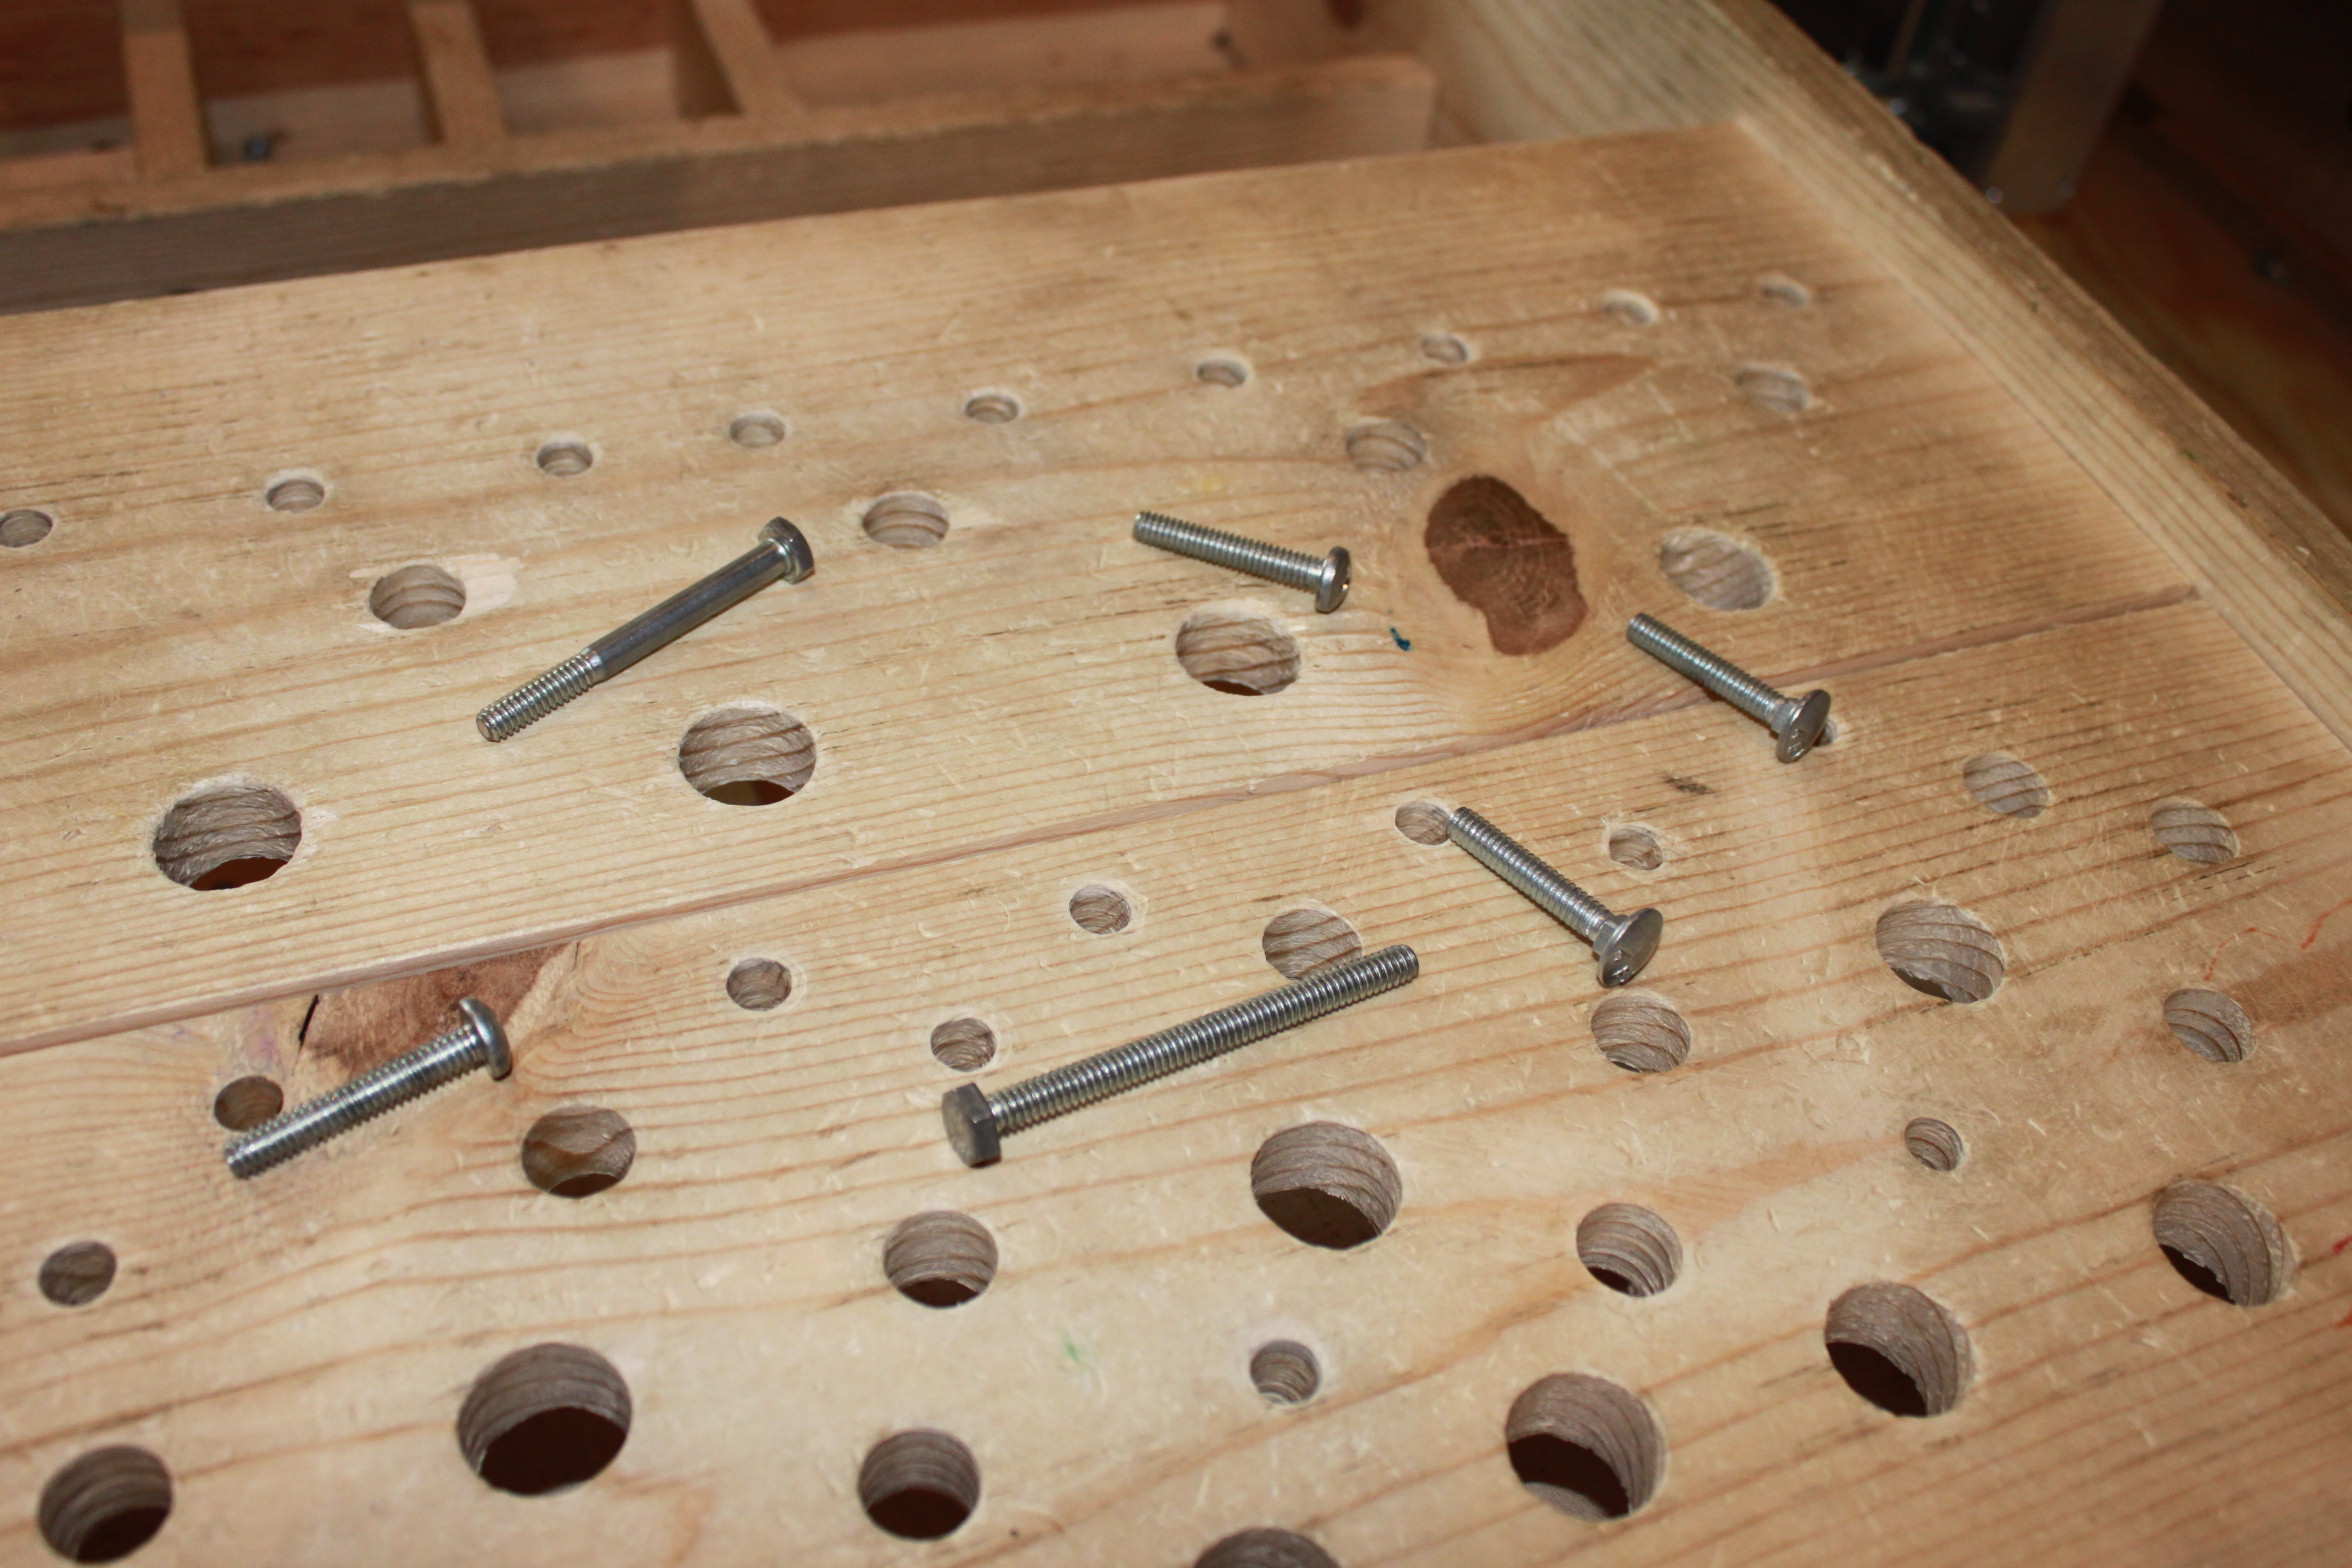
You will need to access both sides of the board in order to screw and unscrew the bolts. It is nice to offer a range of different sizes of holes for children to explore different sizes of nuts and bolts and experience trial and error.
