
If you've visited the Eric Carle Museum before, then you've experienced the beautiful architecture of the building and surrounding grounds, including the museum's stunningly high ceilings and southern-facing walls of glass. Here in the Art Studio we are always experimenting with ways to compliment the light-filled room, including the open spaces high above us.
Our newest ceiling display is a collaborative effort by several members of the Studio's staff, in particular, our studio intern, Mitchell Benedetti. Mitchell's original concept was inspired by several images of colorful paper displays he discovered during a search on Pinterest. He wanted to create a joyful display of his own inspired by the seasons with modern geometric patterns.
He created 5-inch diameter circles for this display, but you can make yours whatever size suits you, whether smaller or larger. Here are the steps to follow:

1. Cut and sort tissue paper by color and shape. First, Mitchell (with the help of Studio volunteers) filled baskets of cut tissue papers organized by color and shape to easily make the dozens of circles needed for the museum's display. (Dependent on the age of your kids, you can easily simplify this step by cutting out any shapes you prefer.)
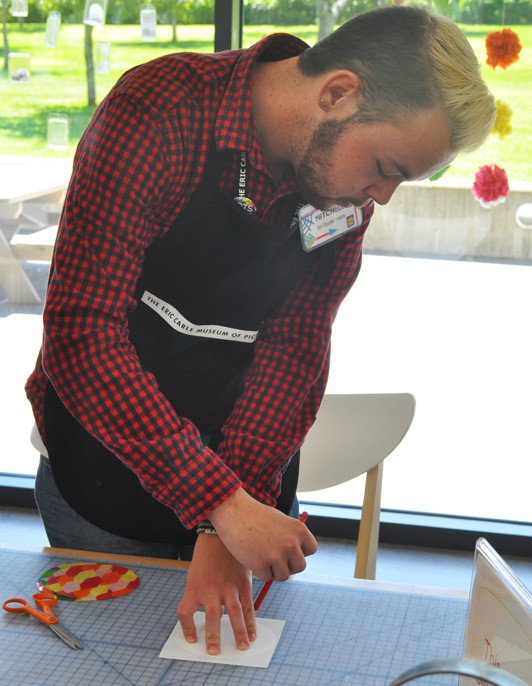
2. Trace circles. After the shapes were sorted, Mitchell traced circles onto the paper backing of contact paper. Any brand of clear contact paper will work.
![]()
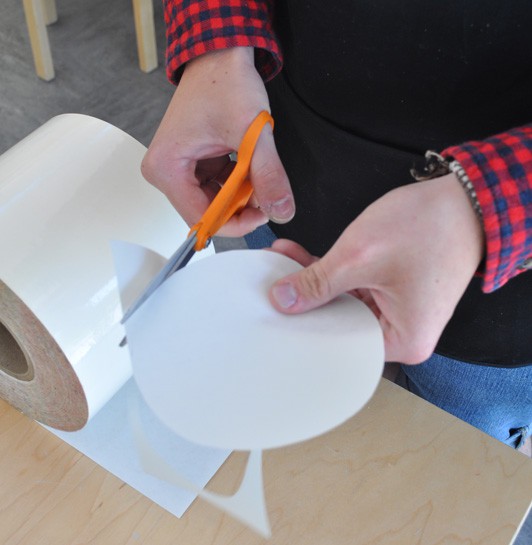
3. Cut circles and peel away backing. Cut out the circle, and peel away the paper backing of the contact paper and place it sticky side up on the work surface.

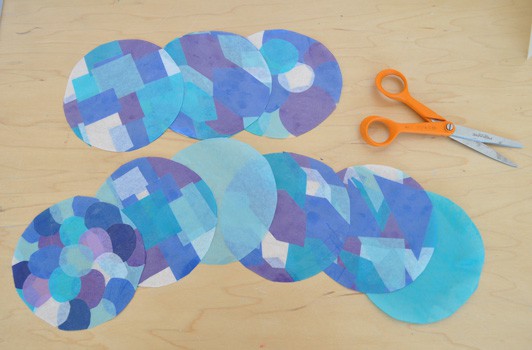
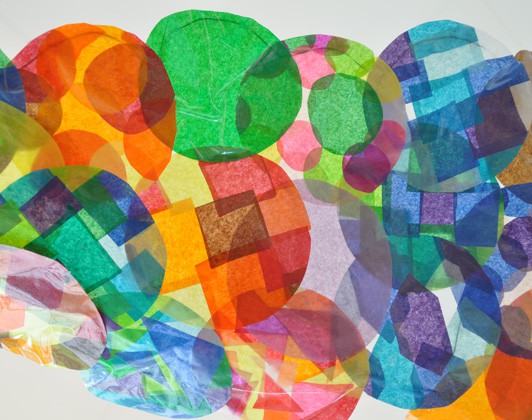
4. Stick tissue paper onto circles. (Now for the real fun!) Press the tissue paper shapes onto the sticky side of the contact paper. Overlap shapes and go all the way to the edges. You don't want any sticky areas showing through. Trim off excess tissue paper along the contact paper's edge. Mitchell left one side with the tissue paper showing, but you could sandwich the tissue between two pieces of contact paper if you prefer. He also created some circles with warm colors, cool colors, primary or secondary colors, plus a few solid colored circles to "rest" your eye between all the busy patterns.
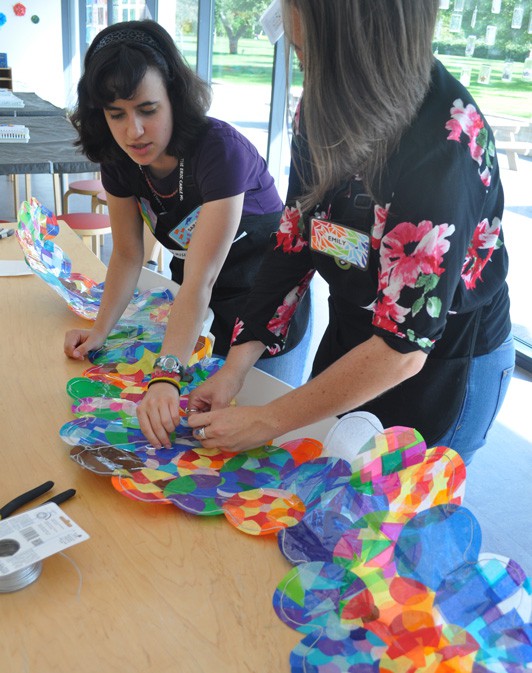
Since the display wasn't quite completed by the end of Mitchell's internship, Studio work study students Emily and Sara helped with the final stages of the project.
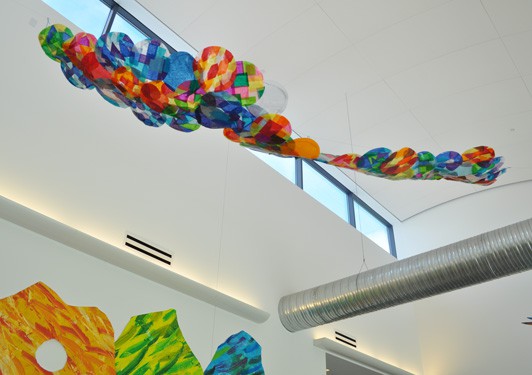
5. Connect circles horizontally. Mitchell's original idea was to hang the circles vertically to flutter and move with the air, but they were curling in the warm sunny windows, so we needed to find a way to display them to prevent unwanted curling. Sara and Emily designed a long flat wave pattern, slightly overlapping them and connecting them together with more pieces of contact paper. To give the circles some structure, they outlined the wave with a metal wire armature all around the edges and a few bars across the piece. We used OOK brand 18-gauge steel galvanized wire for the armature and paper clips hooked from the cross-bars to hang from the ceiling.
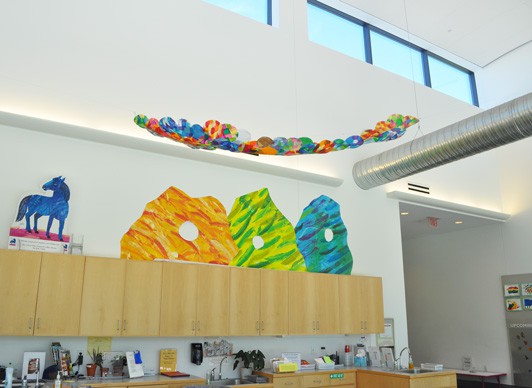
The piece is hooked to a fishing line suspended between the heating elements on either ends of the ceiling. We curved it slightly so that you could see the circles from many angles. The fishing line gives it the appearance that it's floating like a colorful cloud!
The rainbow compliments the large painted banners, created by Eric Carle, that we have hanging above our built-in cabinets, and no doubt it will enhance any room in your home you hang it in.
