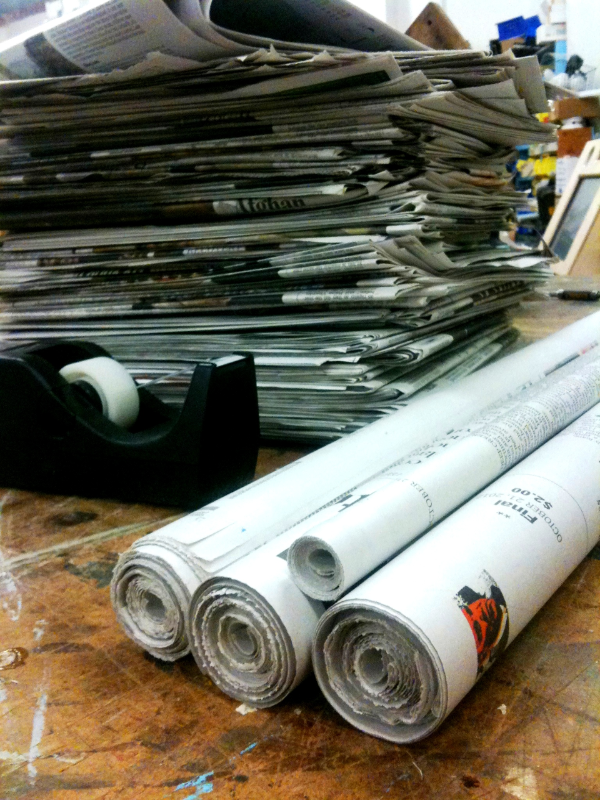
Kids often surprise us when we ask them for ideas of what they’d like to make. Early in The MAKESHOP Show project, we expected to hear things like “rockets,” “castles,” or “spaceships.” But we were struck by the number of children who suggested small models constructed out of twigs, notebook paper, or cereal boxes. It was almost disappointing, until we fully grasped that a 7-year-old can be a realist. When you are small, you make with what’s at hand and at a scale that seems feasible: a Frisbee made out of construction paper, a car from toilet paper rolls.
We grew excited to show young makers that they could find more potential in everyday things and creative people than they might imagine. And so, voila: Newspaper Chair came to being. You can make a useable chair — and even a full-sized dining room set — using some rolled newspaper, tape, and patience. This project introduces basic concepts of structural engineering and physics, and teaches kids how to use a power drill.
Newspaper Chair Insider Tips:
- This project is a great introduction to the power drill (for moms, dads, and older kids) because it’s almost impossible to go wrong and the repetition builds confidence and coordination.
- Learn the basic assembly, then get creative! You can build a seat, stool, or table in a variety of shapes: hearts, squares, benches, letters, numbers, etc.
- In the video below, we make a comics-themed chair by covering each finished roll with the comics pages. You could use other types of paper – such as wrapping paper, wallpaper, maps, your child’s artwork -- to personalize the piece.
- Using an archival spray from a craft store will prevent the newspaper from yellowing over time.
Materials:
- Newspaper
- Transparent Tape
- Power Drill and Long Screws (approx. 1.5” to 2” long OR
- Strapping: like string, rope, ribbon, luggage straps, duct tape, etc.
Our Newspaper Chair is based in structural engineering, a field that designs structures to support or resist loads. In this case, the load is YOU when you sit in this awesome newspaper chair!
Directions:
Step 1: Rolling the newspaper. It might be surprising that newspaper can hold the weight of a person, but there are two design elements that make it work: 1) Columns and 2) Distribution of weight.
Create columns by rolling newspaper. A column bears a load by transferring into the floor the pushing force of the load above it (structural engineers call this “pushing force” compression).
- Begin with just a few sheets, so that the core of the roll is tight.
- Start rolling at the crease, or center, of the newspaper and roll out toward the edge.
- Once you have a tight core roll, secure the edges with tape so it stays tight.
- Lay this core roll on top of new sheets and roll them around it, taping the end of each new layer. Add layers until the cylinder is at least as big around as your wrist.
Step 2: Make a LOT of columns! Try leaning on just one roll. It will bend! But by using many columns, each one doesn't have to be strong enough to hold you up on its own. They share your weight. This is called distribution of weight, meaning that things are stronger when weight is spread among them evenly.
While you roll, you and your child can decorate your chair by adding a special outside layer of paper to the columns that will form the visible outside of the seat and back. All comics? All sports pages with your favorite local team? Cool wrapping paper? If you can find multiple copies of the same newspaper, wrap the same sheet on a row of columns, slightly turned, to spread one big image across the whole seat. Try it!
Step 3: Building the Seat. You can build the seat using strapping – like colorful duct tape – or using a power drill and long screws. This is a great project for drill beginners. *SAFETY NOTE: Adult helper required for young makers. Never use a drill without supervision. Attaching columns together involves 3 steps:
- Hold together the 2 columns you want to attach.
- Drill a pilot hole as a guide for the screw. It should completely pierce one column and halfway through the other. The bit should be slightly smaller around than your screw.
- Drive the screw in until its head is flat against the newspaper. If you drive in too far, it will push in on the column wall – slightly unscrew it back out a bit by reversing the drill direction using the reverse button on your drill.
- First, attach 3 columns together in a line: 1, 2, 3!
- Next, attach 2 on top and 2 below, nestled into the spaces between columns. It will look like a flower from the end.
- From this point on, you can work around the edges, adding more columns until your seat is as big around as you want.
You can create any shape of seat you want — a heart? A flower? A rectangle bench? Ask your child what inspires him or her, and make it your own!
Step 4: Adding a Back. You can stop at a stool/ottoman, or add a back to make it a real chair.
- Attach columns to form the chair back by anchoring the base of new column to the upper back of the seat.
- Use 2 screws to secure each one.
Step 5: Adding a Seat. You can add a pillow or cushion for your seat OR build one out of newspapers by laying short rolls horizontally across the top of your seat and securing them with your new power drill skills!
Have a seat! The columns will hold your child — and you — through compression and distribution of weight for a sturdy, creative chair that’s one of a kind.


