
Your kids and their friends will love making colorful, scented lip balm, using beeswax, Kool-Aid drops, and coconut oil.
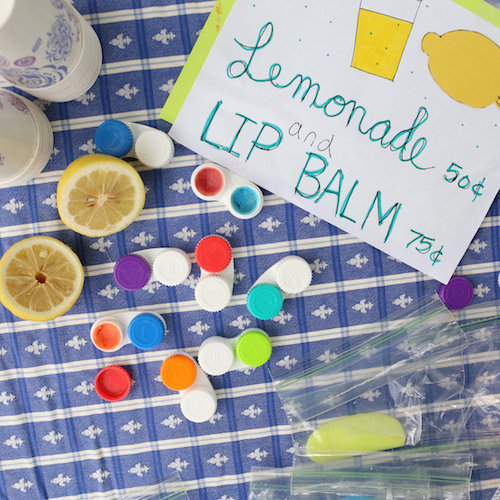
Since this simple project uses a few items you may not have on hand, it may require a quick shopping trip. The colorful plastic contact lens containers we used to hold our lip balm are available at Target, but any small container will work. Co-ops and Whole Foods usually carry beeswax beads, but they’re available online as well. Coconut oil is generally available anywhere you can buy groceries.
Safety Tip: To avoid burns, the heating and pouring steps should be be performed by an adult.
Ingredients
- coconut oil
- beeswax beads or grated beeswax
- colorful flavored liquid drink mix drops (such as Kool-Aid brand)
- small containers with lids, like empty contact lens cases, to hold lip balm
- toothpicks or craft sticks for stirring
What to Do
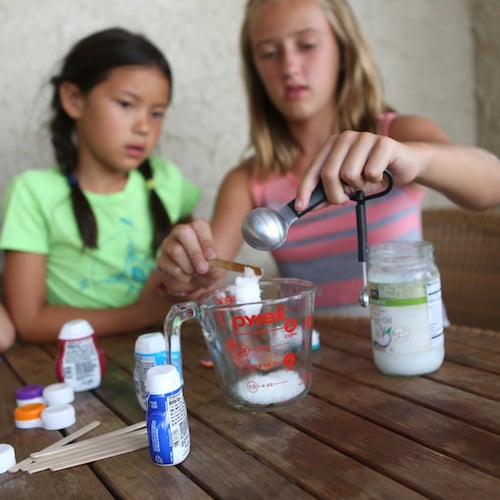
Step 1: In a microwave-safe container, have you kids mix together two parts coconut oil to one part wax beads. (For example, 8 Tbs. coconut oil, 4 Tbs. wax beads.)
Step 2: Microwave the mixture on high at 30 second intervals, stirring in between, until the wax is completely melted and the solution is clear.
Step 3: Cool the hot liquid briefly. If it gets cloudy or turns white, you’ll have to reheat it in order to pour it.
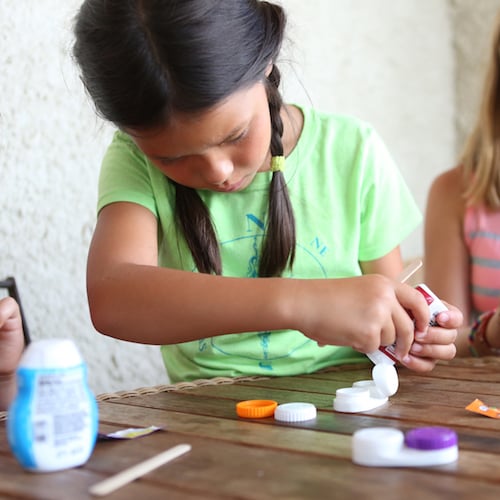
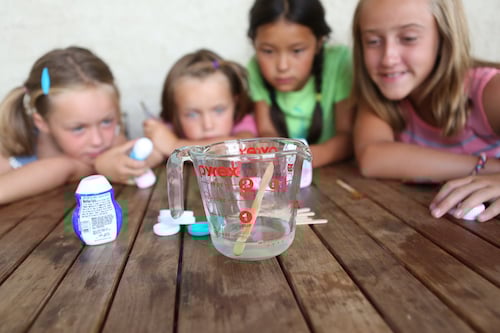
Step 4: While the solution cools, have your kids add a drop or two of flavoring mix to each of the lip balm containers.
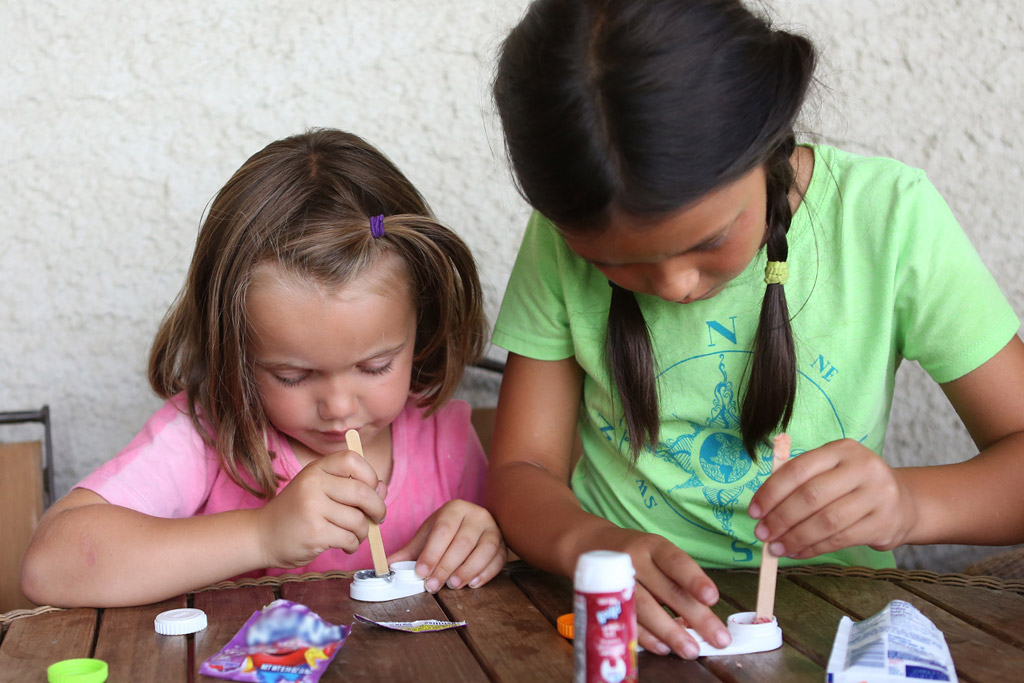
Step 5: Carefully pour some hot oil/wax mixture into one of the lip balm containers. (Again, you should conduct this step.) Have your kids stir it with a toothpick to mix the color in and continue to stir as the lip balm cools into a smooth paste. Repeat until you’ve filled all of your containers. (The wax/coconut oil solution can be reheated if it starts to harden before you’re ready to pour it into smaller containers.)
Step 6: When the lip balm has cooled completely, kids can smooth it off with a clean utensil so that it’s ready to use, or give to a friend!
Step 7: (Optional) Let your kids engineer their own lip balm recipe using this recipe paired with other safe ingredients, like Shea butter, peppermint oil or vitamin E (generally available online, at co-ops and at Whole Foods). Research the safety of all extra ingredients and label your lip balm if it contains possible allergens! Use a notebook to keep track of the recipes you create.
The Science Behind the Fun
Coconut oil is a mixture of fats and oils that is somewhat solid at room temperature, but melts easily when it gets hot. In this lip balm recipe, it serves as a moisturizer called an emollient, which acts as a barrier to hold the natural moisture in your lips. Beeswax melts at high temperatures, but is solid at room temperature, and thickens the lip balm.
Because oil and water don’t mix, and your colorful flavor drops are mostly water, you have to keep stirring them into the cooling wax and oil mixture. This forms a suspension of tiny globs, called an emulsion, that gives the lip balm a smoother consistency.
You can find more experiments like this one at kitchenpantryscientist.com, and in my books Kitchen Science Lab for Kids (Quarry Books) and Outdoor Science Lab for Kids (Quarry Books).
© Quarry Books, 2016/Outdoor Science Lab for Kids
Featured Photos Credit: © Quarry Books
