
Here in New England, the latest snow storm was Mother Nature's way of telling us that spring is still a good ways away (The enormous piles of snow out the window are hard to ignore!). But not all hope is lost! Snow can be fun; you can sled down it, ski on it, and snowshoe through it. So why not also use it as a blank canvas for your family's colorful designs?
You will need:
- Transparency Film sheets (We used 8.5"x11" 3M brand Transparency Film for Copiers) available at office supply stores
- Permanent markers (we used Sharpies)
- X-ACTO knife, box cutter, or scissors
- Hole punch (optional)
- Self-healing cutting mat or cardboard (to protect your work surface when cutting)
- Spray bottles
- Food coloring (We used McCormick brand)
- Snowy surface (picnic table, bench, car, steps, or the ground)
What to do:
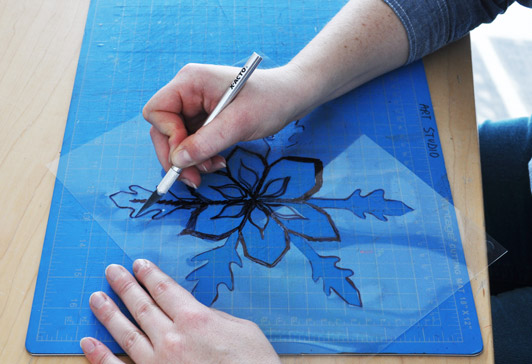
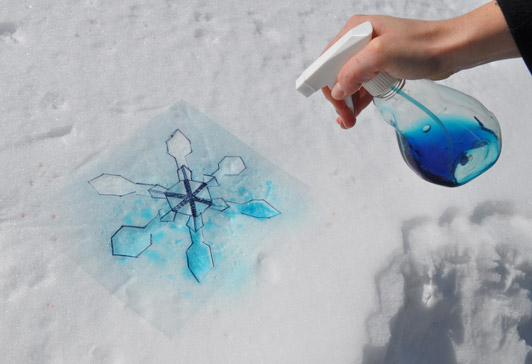
For our stencil designs we made snowflakes, but feel free to use any imagery you like best. After drawing the snowflake design with Sharpies on the transparency film sheet, use an X-ACTO knife to cut away certain areas of the image and leave others behind. Instead of using a sharp X-ACTO blade, children could cut around the perimeter of their designs with scissors for their stencils.
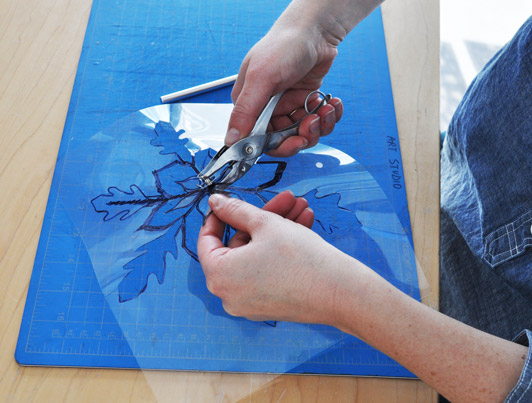
After cutting out areas of the image, you might like to use a hole puncher to add extra decoration around the stencil.
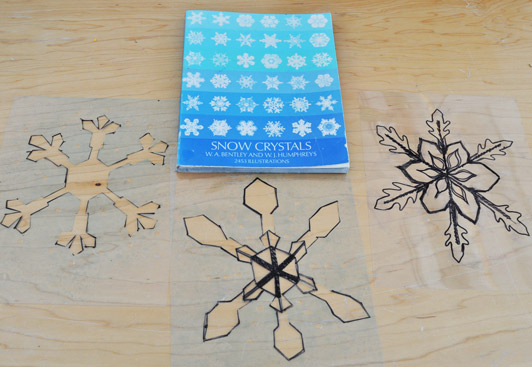
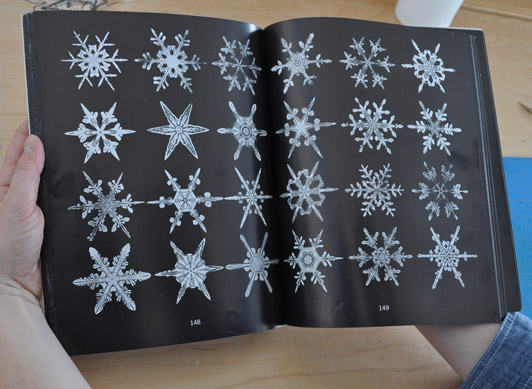
In case you'd like some snowflake inspiration, try W.A. Bentley's Snow Crystals. The book is full of photos of hundreds of real snowflakes Bentley photographed over the course of his career documenting the formation of ice crystals. If your children are curious about the snowflake photos, you can teach them about W.A. Bentley with Snowflake Bentley, a picture book by Jacqueline Briggs Martin that tells the story of Bentley's life.
Here's a tip: snowflakes have six points. You might want to keep this in mind when you're designing your snowflake stencils, but feel free to get creative!
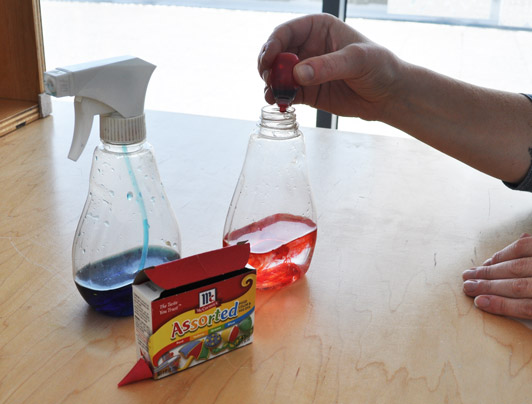
Aside from the stencils, you need to prepare your colored water. Simply add food coloring to the water in a spray bottle (or try our Eric Carle Museum friends' tutorial on how to use old markers to make colored water). If you'd like your colors to be darker, don't fill the bottle too much — the more water you add, the more muted your colors will be and the more food coloring you'll need.
Bundle up and head outside with your child on a cold sunny day to test them out!
If it's windy, use your free hand or have a friend help you hold down the stencil while you spray so it doesn't blow away.
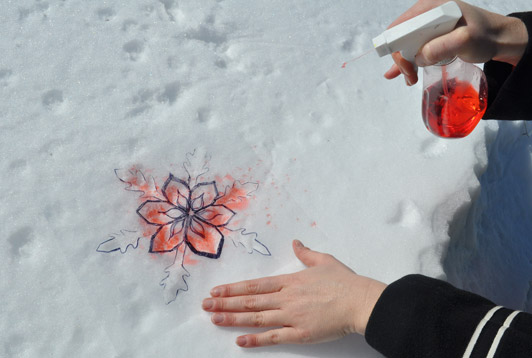
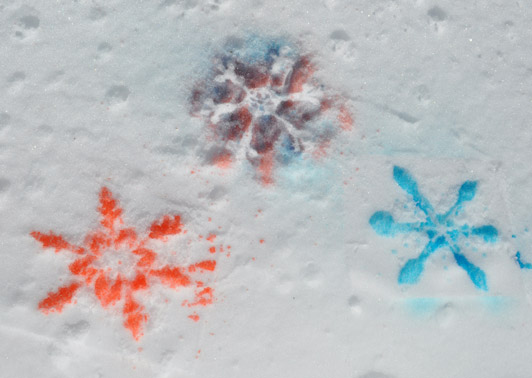
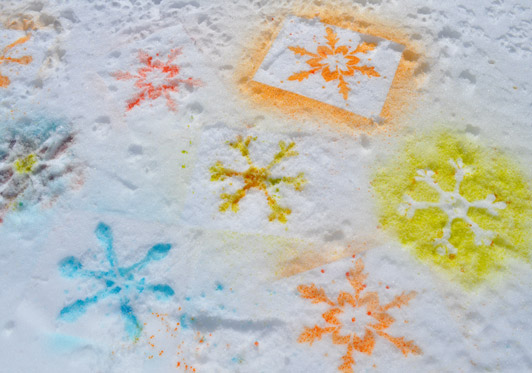
The snow actually holds more details than you might think. If your spray bottle has "spray" or "stream" setting, try using the "spray" option and holding it about 1 foot above your stencil so you get a soft, even mist that sits on the snow's surface. The "stream" setting is sometimes so powerful it melts the color down into the snow and looks more muddled.
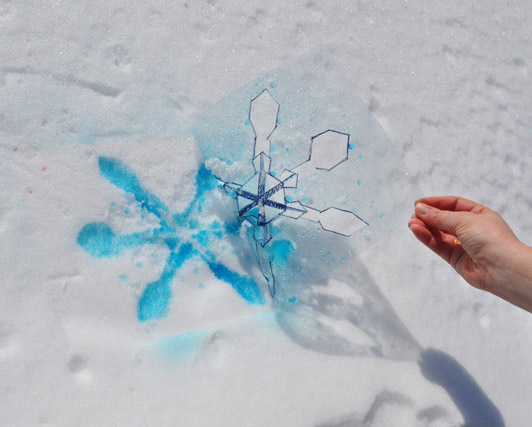
When you're done spraying, gently peel away the stencil to reveal the design underneath. If you leave the stencil on for too long, it might bring some of the top layer of snow with it, so work quickly.
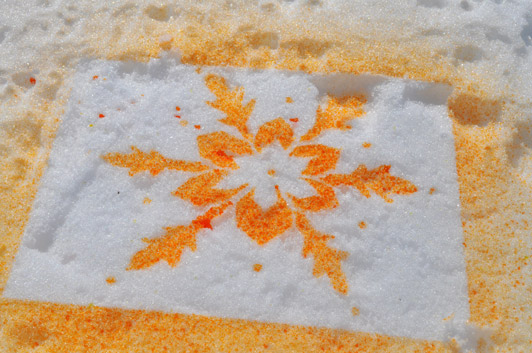
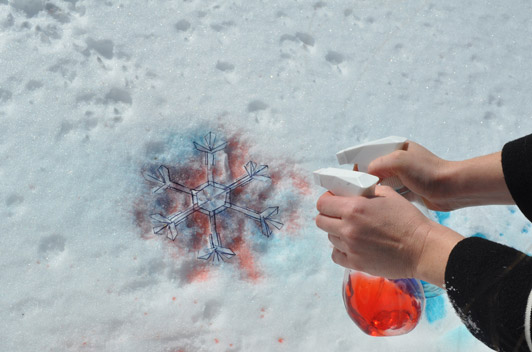
With just a 4-pack of food coloring and 4 stencils, the outcome can be really colorful and exciting! The transparency film is great because you can shake off the excess snow and reuse the stencil over and over again.

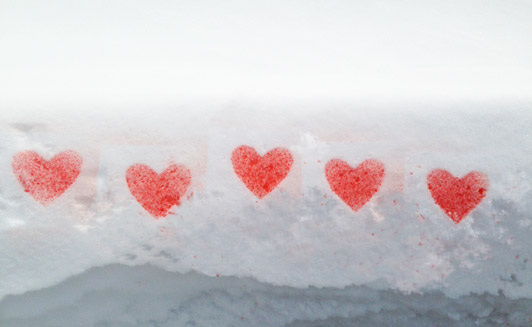
One of the Eric Carle Museum's student employees was inspired to make a heart snow stencil to send a one-of-a-kind valentine to her boyfriend on Valentine's Day, who's currently studying abroad. She took photos of hearts around her college campus in places that were meaningful to them and sent them in an overseas email.
The photo below is a row of hearts I stenciled along The Studio's patio after our most recent storm. If someone in your family has a late-winter birthday, surprise him or her with a special snowy message!
To make your own very snowy caterpillar, click here for a Winter Snow Painting tutorial by the Eric Carle Museum.