
Editor's note: This post was originally published on June 15, 2016.
We’re always trying to think of ways to shade and catch the beautiful sunshine that streams directly through the Art Studio’s wall of south-facing windows in the cold months. Inspired by the array of twig stars I’ve seen on Pinterest, staff in the Art Studio helped me create this great arts & crafts project for your kids that will leave your family with lovely stained-glassy-stars that can hang in your window.
Steps:
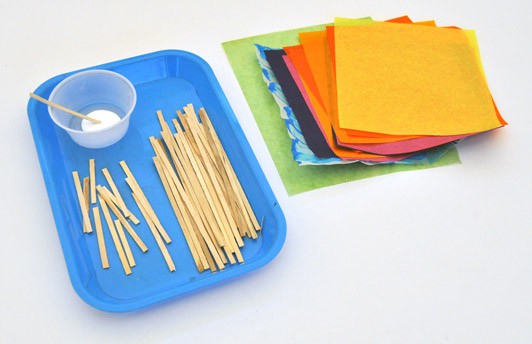
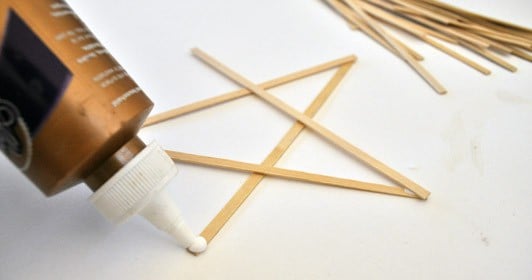
1. First, we made the stars’ forms with wooden coffee stirrers and tacky white glue. One of our staff liked using one of the stirrers to apply the glue - and no doubt your kids will too.
TIP: Let your kids work on a plastic placemat so they don't have to feel restrained, and YOU won't need to worry about the stars sticking permanently to your work surface.
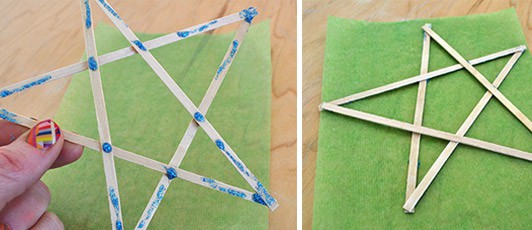
2. After the stars dried, we glued them to tissue paper, tracing paper, and Folia Transparent Paper. Some of us used glue sticks, others used white glue. Which is better? In the long run, white glue is always more durable, but glue sticks are easier for your kids to use. If you try this, experiment to see which works best for you! Or ...
... try experimenting with glitter glue, like I did on this one!
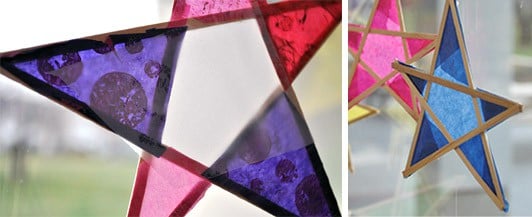
3. After the stars dried on the paper, we trimmed the paper as close to the wood as we possible. The stars that have multiple colors were made by gluing just one of the star’s arms to the tissue paper, cutting it out when it dried, and then repeating for the other arms. One of our staff members liked the effect created by folding some of the excess paper toward the middle of the stars’ arms. As it turns out, folding the excess paper is easier than cutting it close to the wood. Depending on your kids' ages, this is a step they may need some help with.
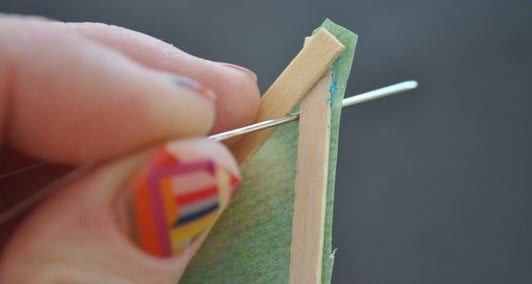
4. To hang the stars, we first put a piece of clear tape on the back of one of the points. The tape gives the paper a little strength so that it wouldn’t rip when strung together. We threaded a needle with a long piece of fishing line, sent it through the taped point almost to the end of the line, and then tied a small knot around the intersection of the wooden sticks to hold it in place. Then, we sent the needle through the point of another star and knotted it in place so that it would hang somewhere above the bottom star. Again, this is a step that will most likely require a parents help, unless your (older) kids know how to sew.

5. Repeating this process, we strung multiple stars to each line and ended up with 7 lines that have 3-4 stars each.
6. Finally, we wound and taped the lines to a tension curtain rod hung in the window.The stars could be hung in other ways too: across a line like bunting, around a form such as an embroidery hoop to make a chandelier. Ask your children for their ideas!
TIP: To make this a more open-ended exploration, try offering your kids tissue paper or Folia Transparent Paper, wooden coffee stirrers, glue and the question: “What can you make with these materials?” Maybe they’ll be inspired to make stars, or maybe something else!
