
Whether you’re an avid gardener, or just like to stop and smell the roses, you’ll love these activities to do alongside your child. Each one is a great way to bring science to life. That’s especially important if your child learns best by doing. But even if your main goal is bonding, not better grades, these simple ideas are sure to make family fun bloom.
Try a Terrarium
Many of us remember terrariums in our elementary-school classrooms. They weren’t there by accident; our teachers knew they were great (low-maintenance) learning tools. These sealed, plant-filled containers are mini ecosystems that show photosynthesis, respiration, and the water cycle in action. You don’t even need to water the plants! As the moisture in the air condenses, it’s absorbed by the soil.
What you’ll need:
- Glass jar with water-tight lid
- Pebbles or gravel
- Activated Charcoal
- Damp soil or sand (for succulents, use sand; ferns and wet-climate plants, soil)
- Dried moss or grass
- Plants
What to do:
- Line the bottom of the jar with pebbles or gravel. This is for drainage.
- Add a layer of activated charcoal. This helps clean the water.
- Place a layer of dried moss or grass.
- Put the soil or sand on top of that, making sure there’s room for your plants.
- Add your plants and any decorations you like.
- Close your terrarium, and place it in indirect light.
- Upkeep is practically non-existent. Add small amounts of water if needed or open the lid for a few hours if the system is too moist.
Check out our video tutorial to learn how to make your very own DIY Terrarium.
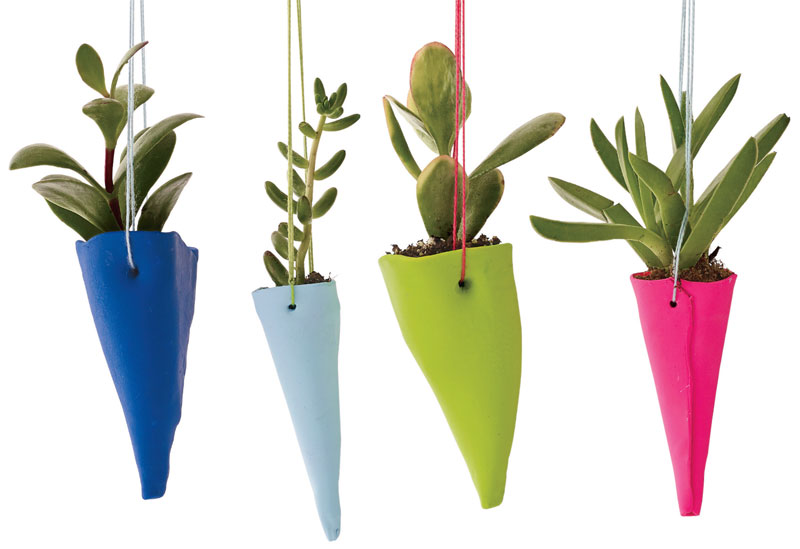
Make a Hanging Planter
Creating your own hanging planter is lots of fun for kids and grown-ups alike. They’re decorative and practical, especially when they hold easy-care succulents, like this one does. Bonus: They also make perfect gifts for Grandma or Grandpa. Put together a few extra if a birthday or holiday is coming up.
What You’ll Need:
- Polymer clay (such as Sculpey)
- Waxed paper
- Cutting blade or knife (for adults only!)
- Baking tray
- Parchment paper
- Colored string
- Small succulent
- Potting soil
What to Do:
- Roll the clay on waxed paper. Flatten into a quarter-inch disk.
- Cut a small cone shape. Join the edges and press them tightly together to seal (otherwise, it may leak).
- Poke a hole on each side of the cone.
- Place a ball of wax paper in the cone so it doesn’t collapse.
- Bake on a tray covered in parchment paper according to the directions on the package of clay.
- Let your cone cool, then run string through the holes and tie to secure.
- Add potting soil.
- Plant your succulent.

Clone a Plant!
It may sound like science fiction, but cloning (plants, that is!) is straight-forward enough to do at home. Plus, it’s pretty magical to see a little stem sprout new roots!
What to Do:
- Take a few 4- to 6-inch cuttings (coleus, spider plants, and pothos vines work especially well).
- Remove the leaves from the cutting’s lower half; put the stems in a glass of water and place them in indirect light.
- Change the water every other day, and watch for roots. Talk about plant reproduction: Cuttings are a way to create new plants, which are clones (or exact genetic copies) of the original. Plants also reproduce sexually via their seeds.
- Once roots appear, wait 10 days and then transfer the cutting to a pot with soil. Water immediately.
- Let your child keep the new plant in his room — he’ll love helping it thrive.
Grow an Alpha Lawn
Talk about a twofer! Growing an alpha Lawn teaches young children about plants and spelling. Seeds sprout and grow into a child’s initials, name or, if you’re feeling ambitious, the whole alphabet. Let your child use his imagination! Bonus: Gratification comes quick because grass seed grows fast!
What You’ll Need:
- Aluminum tray at least 3 inches deep and big enough for what you want to spell (disposable foil baking pans work great)
- Sand
- Soil
- Grass seed
What to do:
- Put a ¾-inch layer of sand in the bottom of the tray.
- Cover the sand with about 2 inches of soil.
- Using a finger, stick, or butter knife, carve out the letters in the dirt.
- Fill the crevices with the seeds.
- Cover with soil.
- Water and place in a sunny spot. (If your child really wants the tray in his room, but it won’t get sun there, use shade-friendly grass seed.)
- Watch it grow!
- Water regularly, and help your child trim the grass occasionally, so that the letters are still easily recognizable.
Make a Little Magic
Grab your copy of Jack and the Beanstalk, then make the story come to life with this activity!
What You Need:
- Any dried beans (not canned)
- Paper towels
- Glass jar
- Plastic wrap
- Rubber band
- Needle (grown-ups only)
What to Do:
- Moisten a paper towel, and gently form it into a loose ball. Place it in the bottom of the jar.
- Place three or four beans on the paper towel.
- Place another towel prepared the same way on top.
- Cover the jar with plastic wrap and seal with a rubber band.
- Poke a hole in the wrap with the needle, and put the jar in a warm spot.
- Watch as the beans germinate, after about a week or two.
- Remove the wrap as the stalks get close to it. Once they reach 6 inches or so, plant the in soil.