This print project is a way to reuse the empty plastic beverage bottles we all accumulate, especially in these warm weather months. Who knew you could turn these ordinary vessels into rollable printing tools that your child can use to create beautiful patterned papers.
Getting Started: Cutting Out Foam Shapes
First, have your child cut out designs and shapes with sticky-back foam and stick them all over the round sides of a clean plastic bottle. (If you're doing this project with younger children, cut out the shapes yourself.) The best bottles for this project are clear and smooth 1 liter-sized seltzer and and water bottles. If you don't have those, kids can experiment with the bottles you do have available — in fact, many bottles already come with designs and patterns on the side. Kids can use those kinds of bottles without any foam at all.
Tip: Tell your child to keep the cap screwed on to help keep the cylindrical shape while rolling. Without the cap the air will let out and the bottle may crumple when your child presses down while rolling.
![]()
Prepping the Foam Shapes & Background Paper
Your child should stick to one layer of foam on each bottle. If multiple layers of foam are stuck on top of each other, any details probably won't show up. Have kids create a variety of single-layer shapes and patterns all over their bottles. Some patterns will turn out differently from expected when printed, which is all part of the fun!
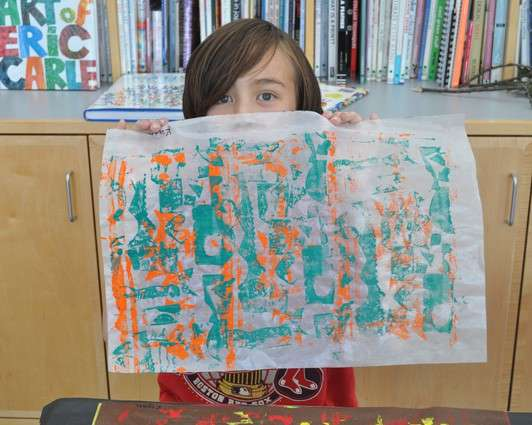
When we've done this project with children in the Studio, we've used Folia paper as the background paper. It's about as thick as a piece of tracing paper, is somewhat transparent, and comes in packs of bright colors. Before starting the project, parents should cut the paper in half, to about 12"x 18". This size is easier for children to work with at the table and carry to the drying area, but still a nice large working area. Any kind of paper that accepts paint will work for this activity, so use what you have available.
Paint Trays Set-Up
Set out large vinyl tablecloths or plastic drop clothes on the floor for the rolling area and to cover the tables for easy cleanup. You can provide kids with just one or two colors for this project — or even more! Brush a thick layer of washable tempera paint in foam trays big enough for children to roll the bottles in the paint by themselves. In addition to the bottles, we'll sometimes provide handmade stamps to add extra details to the papers.

Getting Rollin'
If you are doing this project with a large group or classroom of children, assign each child a paint color. Their bottles will stay in that paint color tray, but they can rotate and use the different bottles and colors available. That way, everyone gets a variety of marks and colors on their papers. We also let kids choose the colors of their Folia papers that they want to use. During our 45-60 minute sessions children have time to make several papers each.

After rolling their bottle in the paint to cover as many of the foamy shapes as they can, children return to the tables and transfer the tempera paint onto their paper by rolling the bottle across the paper, in a rolling-pin motion. The neck and the bottom of the bottle should stay paint-free so it's easy for kids to roll the bottles without getting paint all over their hands.
Paint on hands and clothes is normal for this project, so have kids wear a smock and work near a sink (or even better outside, near a garden hose!) for easy cleanup.

Steps Summary
I always demonstrate all of the steps before we begin so the children can work more independently:
- Have your child choose a piece of paper (if you have several children doing this activity, have each child write her name on the paper).
- Your child should roll the bottle in the paint at the paint station.
- Then, kids should bring the bottle to the table to roll the bottle on paper. Once they're done, bring the bottle back to the paint trays.
- Next, kids should carry their papers over to the drying rack or clothes line.
- Go back to step #1. In the beginning there are usually lots of questions, but after children roll on the paper they immediately pick up on the technique.
We've taught children 5.5-11years old how to do this project. For younger children, expect to provide more hands-on assistance from an adult or older child.
If possible, have kids dry the papers in the sun on a clothes line. as the paint will dry more quickly than just on a rack or table. When the first layer of color is dry, children can can roll a second or third layer of paint without the colors mixing. The papers really pop when there are multiple layers of pattern on them.

The materials are very easy to find and affordable for this activity (you can't beat free!) and the patterned paper can be saved and used for so many future projects. Now get rollin'!
